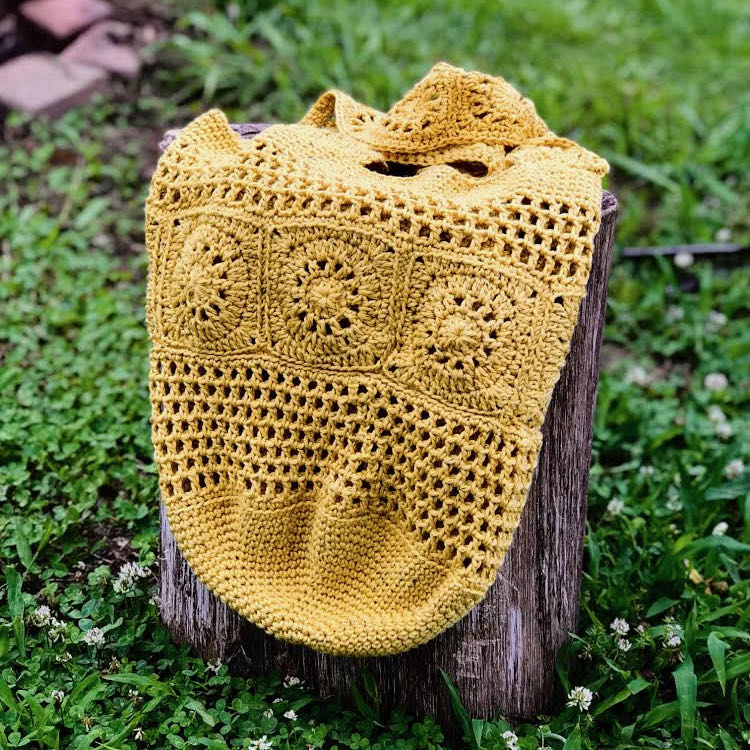
A market bag for successful sunny day shopping trips
Shop in style with the eco-friendly Sunny Day Market Bag! Perfect for market trips, this chic tote is reusable & practical. Get the free crochet pattern on the blog!
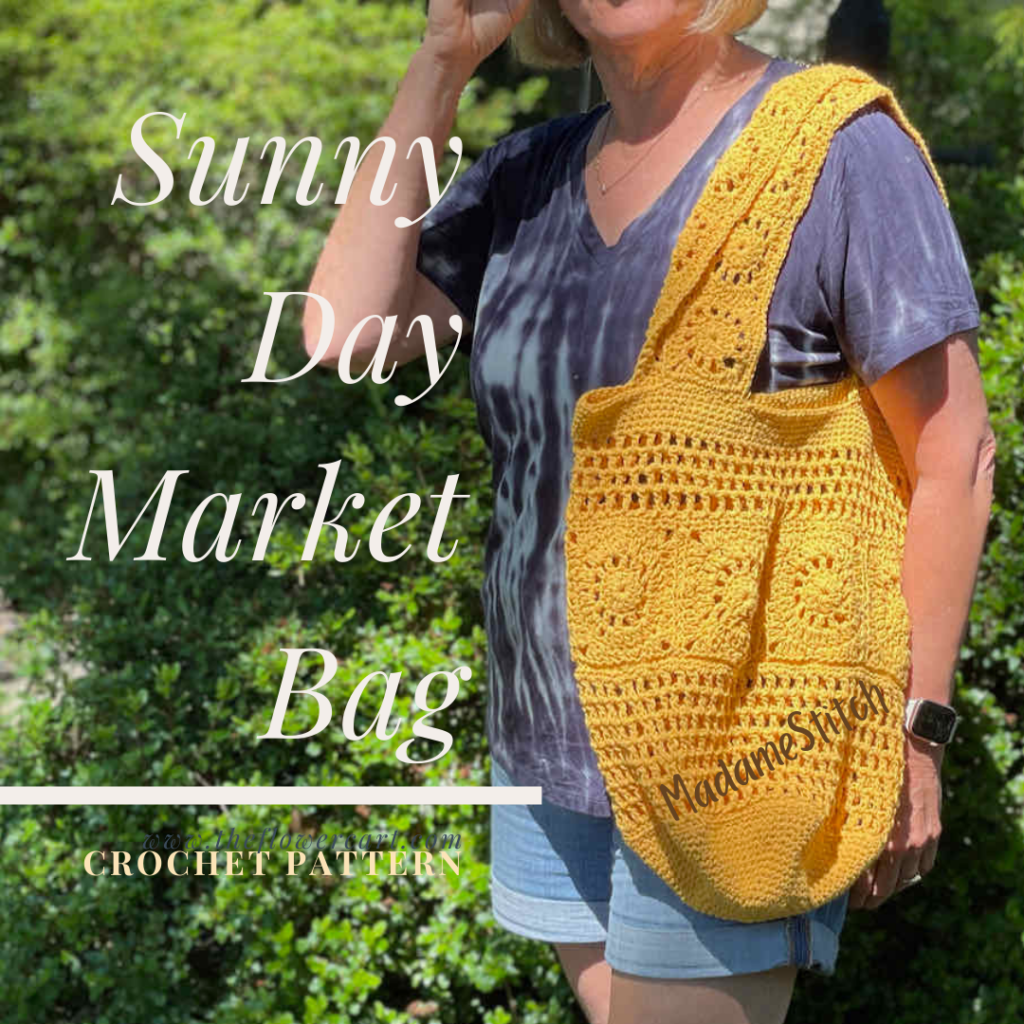
There’s something so satisfying about making and using a handmade market bag—especially when it’s as stylish and practical as the Sunny Day Market Bag!
I love having a sturdy, reusable tote for trips to the farmer’s market, beach days, or even just running errands. Crochet market bags have become a favorite project for so many makers because they’re quick to stitch up, endlessly useful, and a great eco-friendly alternative to plastic bags.
Plus, they’re a perfect blend of function and fashion! If you’ve never made one before, now’s the time—this free pattern will have you hooked in no time!
The Sunny Day Market Bag
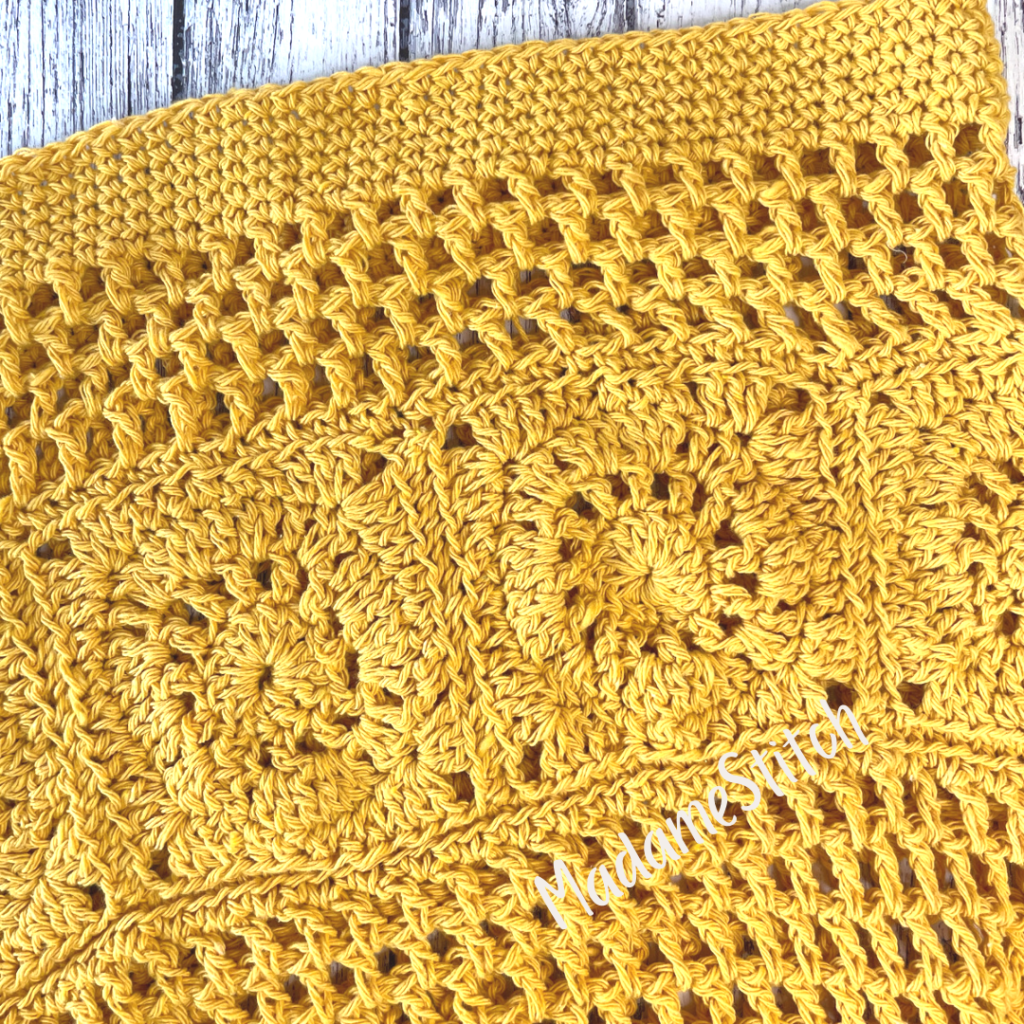
Design + Construction
I love to design market bags because they offer such a wide range of design possibilities. They’re great for the environment, and their durability and easy care make them an ideal choice for shopping trips. They can be wonderful stash-busting projects and they make great gifts, too!
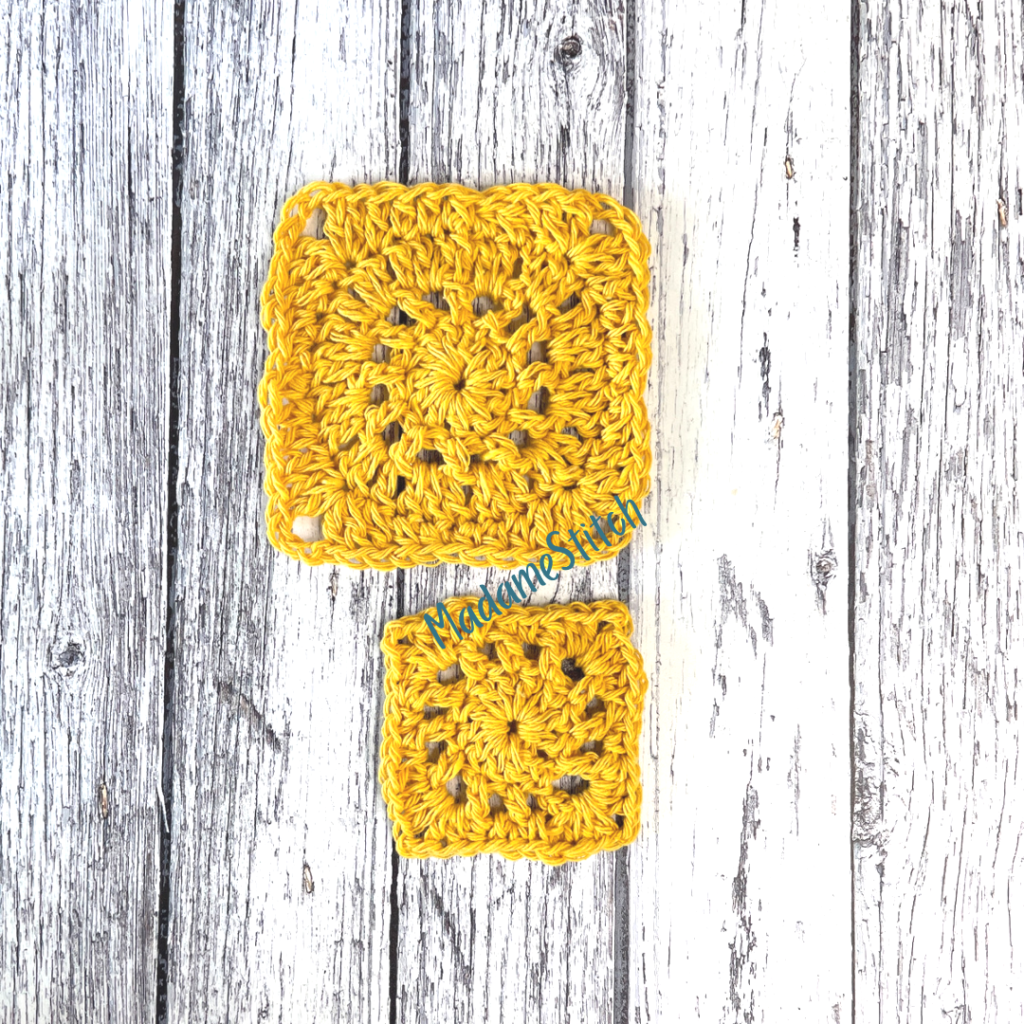
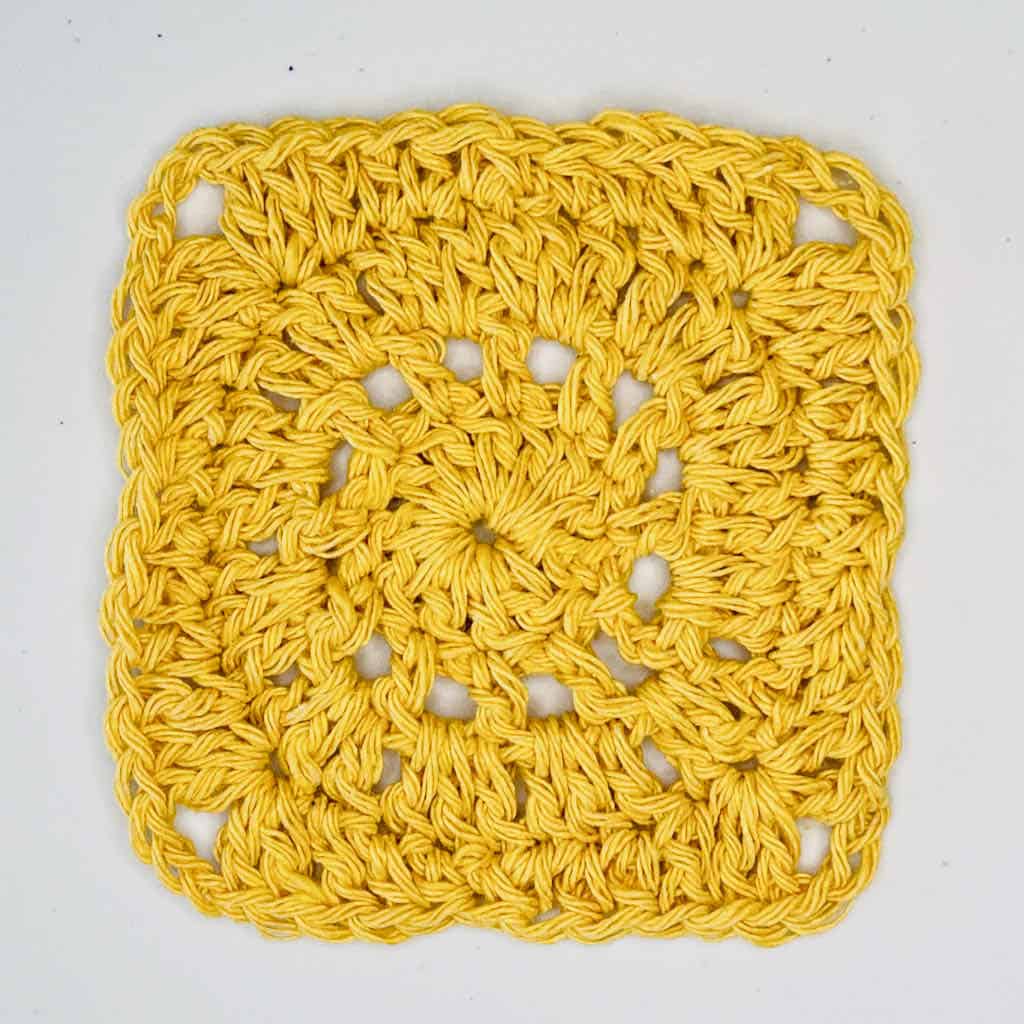
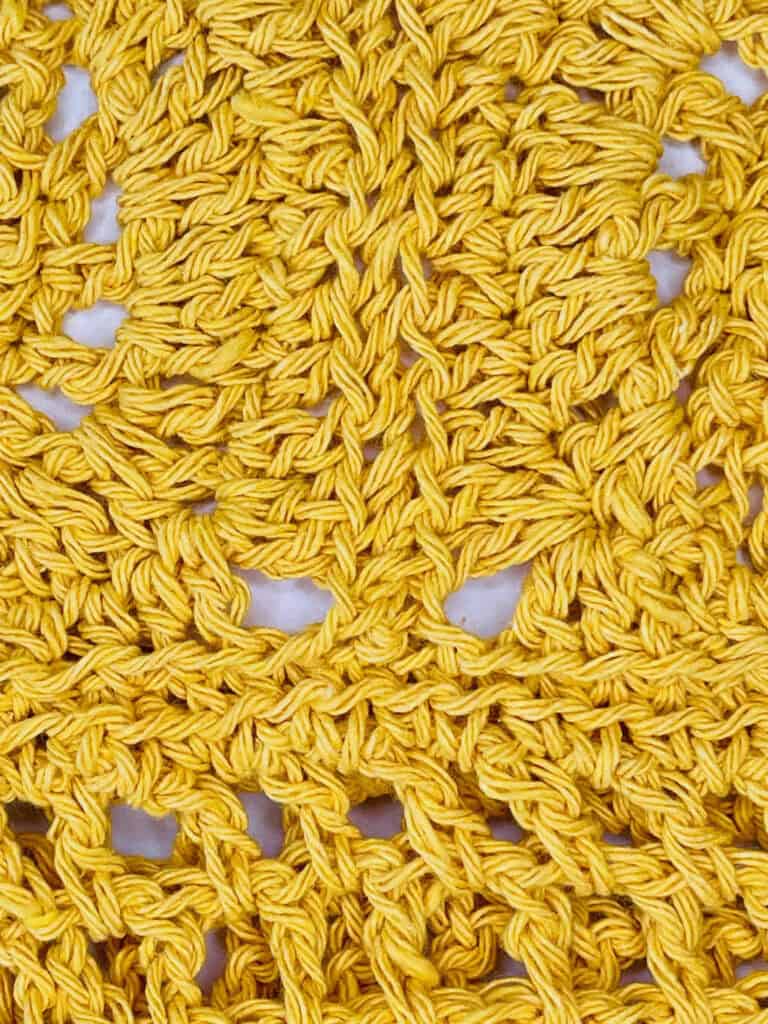
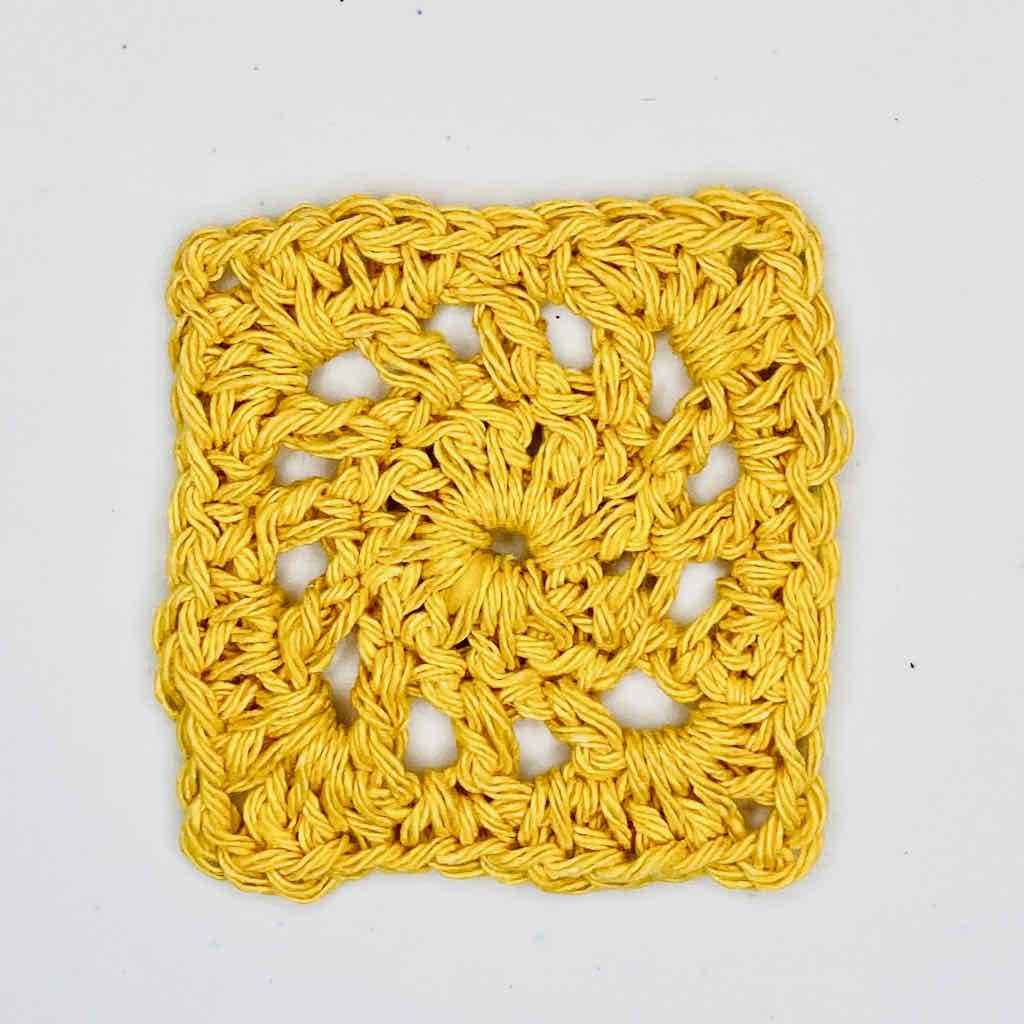
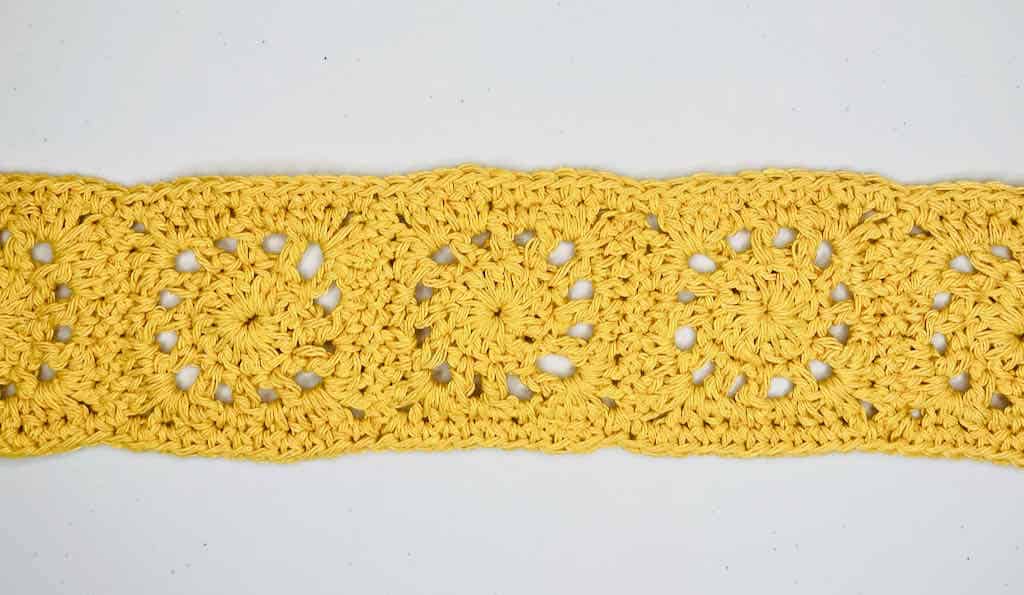
I got the idea for the Sunny Day market bag when I saw the color of this yarn (Sunflower). It reminded me of sunny days in the height of summer. So, I whipped up a 4 round motif that looks like a sunburst!
Tucked in a line right in the middle of the bag, they add just the perfect accent for your market bag. Generous straps mean you can sling the bag over your shoulder for easy transport. And, the strap motifs are mini versions of the ones in the bag!
Here are the steps you’ll go through to make your very own market bag:
- The sunburst motifs for the middle of the bag are made first.
- The body of the bag starts with a flat circle worked in continuous rounds.
- The motifs are joined in a ring and joined to the body before the rest of the body is completed.
- The wide straps are strips of smaller motifs for a delightful touch that pulls the look of the entire market bag together.
Skill Level: Advanced Beginner/Intermediate
Because of the variety of stitches and techniques used in making this market bag, I would lean toward Intermediate.
If you are an advanced beginner, take your time with the instructions and use the photos for things you’re unsure of.
The Yarn
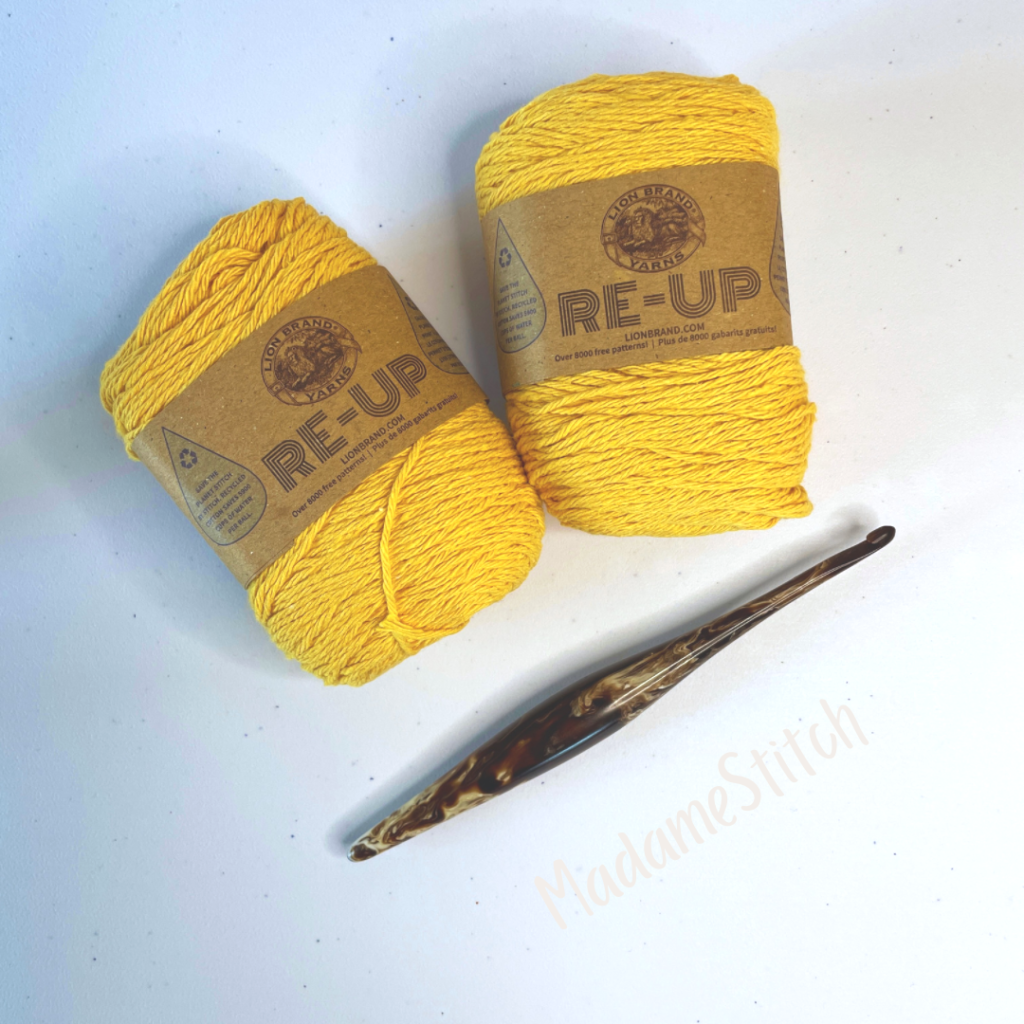
Over the last few months I’ve made it a priority to try new yarns. Re-Up, made by Lion Brand, is a recycled cotton yarn that’s eco-friendly. I instantly fell in love with the feel of the yarn and the brightly saturated colors. It’s also inexpensive at just $2.99 for a 2.5 oz skein. This market bag only takes 4 skeins, making it economical to make up.
Yarn Substitution
Unfortunately, Lion Brand has discontinued Re-Up in the 2.5oz skeins. However, you can get the yarn in a bundle cone that will provide you with enough yarn to complete the bag.
The market bag works best with a worsted weight cotton or cotton blend. If you’re looking for a substitute, check out what YarnSub has to offer here.
Use my Yarn Substitution Worksheet to see if your yarn choice will work for this market bag.
Where to get the premium PDF for the Sunny Day Market Bag
- The crochet pattern is written in English, using US crochet terminology.
- Skill-level: Intermediate because of the finishing techniques used (Also appropriate for a confident beginner!)
- The written pattern includes photo tutorials, charts, schematics and detailed instructions for every step of bag construction.
Get the pattern PDF in your favorite shop!
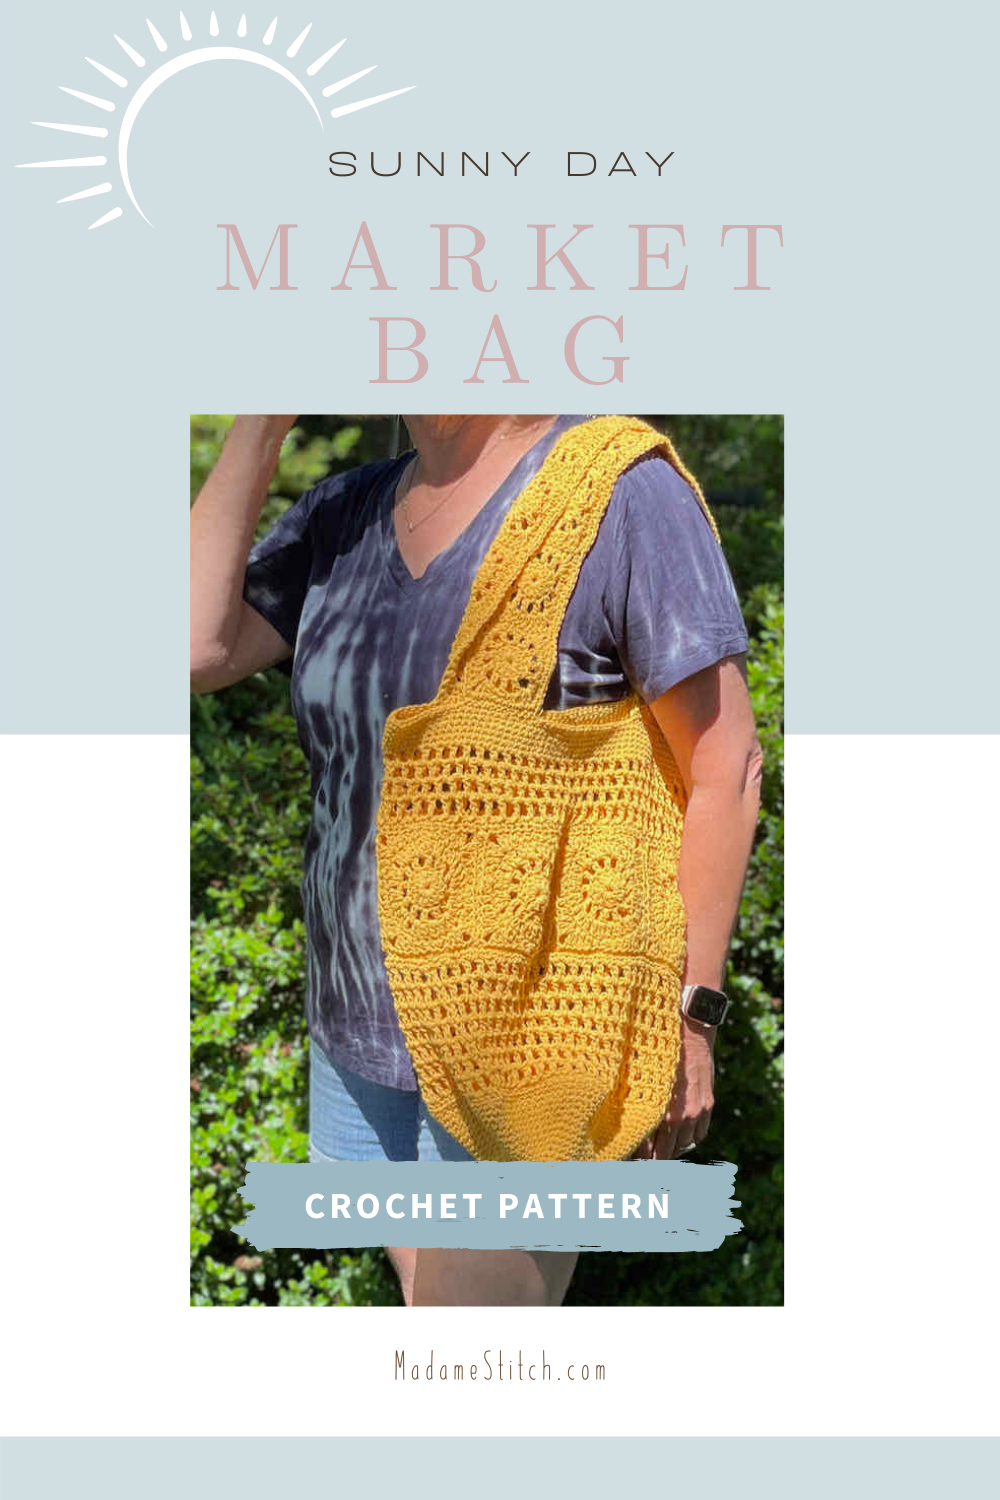
The Sunny Day Market Bag Free Pattern
General Information
Yarn
The sample was made with Lion Brand “Re-Up”, a recycled cotton/polyester blend. It has been discontinued in small skeins. However, the bonus bundle has enough yarn to complete the bag.
You’ll need approx. 450-500 yds of worsted weight recycled cotton.
Hook
US size H-8 (5mm) or size needed for gauge
Tools
- Removable stitch markers (at least 6)
- Tapestry needle for sewing squares together and weaving in ends
Finished Measurements
- General measurement: Approx. 15″ tall x 16″ across laid flat
- Bottom of bag diameter – 10″
- Mesh Section 1 – 5″
- Mesh Section 2 + Top Border – 5. 75″
- Motif for the Body – 4″ square
- Motif for the Strap – 2.5″ square
Gauge
- Approx. 15 sc x 16 rows = 4″
- Bag motif = 4″ square
Abbreviations – US crochet terminology
- beg – beginning
- BLO – back loop only
- ch – chain
- dc – double crochet
- hdc – half double crochet
- pm – place marker
- rep – repeat
- rnd(s) – round(s)
- sc – single crochet
- sk – skip
- sp – space
- st(s) – stitch(es)
- YO – yarn over
Special Stitches
Single crochet decrease (sc dec) – Insert hook, YO, pull up a loop, insert hook in the next st, YO, pull up a loop, YO, pull through all 3 loops on the hook.
Single crochet increase (sc inc) – 2 sc in the same st.
Unlock Exclusive Subscriber Content
To unlock Exclusive Subscriber Content, click on the button in the box below. The Grow.me app window will pop up where you can either create an account or sign in if you already have one.
To create an account, sign in with your existing Google or Facebook account. You can also create an account with an email address and new password.
If you forget your password, simply click the “Forgot my Password”button. I have no access to your Grow account so I’m unable to retrieve or reset your password.
Remember, once you’ve created a Grow account, you never have to do it again. Your Grow account unlocks all the exclusive content created by Grow
Thank you for being a loyal blog subscriber. I hope you enjoy the exclusive content!
Pattern Notes
- This bag is worked in the rnd. Do not turn after any rnd.
- The right side of the bag is always facing you.
- The bottom of the bag is worked without joining at the end of any rnd. Once the bottom is complete, you will join after each rnd as indicated in the instructions.
- The magic number for the body of the bag is 120 sts. The st count is established on Rnd 20 of the bottom of the bag and stays the same for the remainder of the body construction.
- After Rnd 2 of either motif, the circle won’t lay flat. If subsequent rounds don’t solve the issue, steam or wet blocking will ease the sts into place
Pattern Instructions
Before beginning the bag construction…
Bag Motifs – Make 8.
Ch 4, join with slip st to form ring.
Rnd 1: Ch 3 (counts as dc), 11 dc in the ring, join with slip st to beg ch-3. < 12 dc >
Rnd 2: Ch 4 (counts as dc and ch-1 sp), * dc in the next st, ch 1; rep from * around, join with slip st to 3rd ch of beg ch-4. < 12 dc, 12 ch-1 sp >
Rnd 3: Ch 3 (counts as dc), 2 dc in the ch-1 sp, * dc in the next st, 2 dc in the ch-1 sp; rep from * around, join with slip st to beg ch-3. < 36 dc >
Rnd 4: Ch 3 (counts as dc), hdc in the next 2 sts, sc dec, hdc in the next 2 sts, dc in the next st, (2 dc, ch 3, 2 dc) in the next st (corner made), * dc in the next st, hdc in the next 2 sts, sc dec, hdc in the next 2 sts, dc in the next st, (2 dc, ch 3, 2 dc) in the next st; rep from * around, join with slip st to beg ch-3.
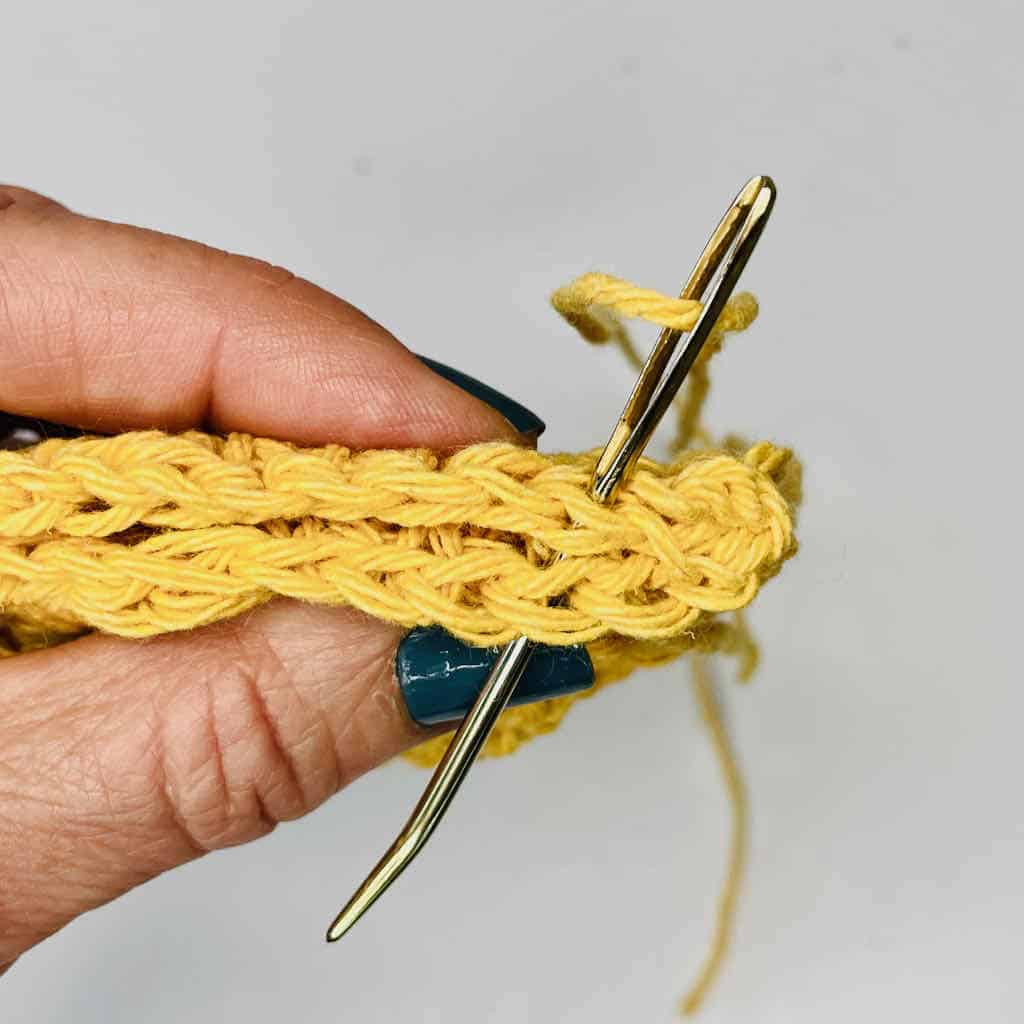
Fasten off and weave in ends.
Prepare bag motifs for attachment to body.
With right sides together, sew the bag motifs together end to end in a single row, joining the first and last motifs to form a ring. Be careful not to twist when sewing the two ends together.
Notes:
- When sewing the ends of the motifs together, stitch from the middle corner chain (the 2nd ch of the ch-3 corner) to the opposite middle corner chain.
- Sew through only one loop, NOT both loops. The seam will lay flat and the stitch count of 120 will be correct when sewing this strip to the body of the bag.
Begin the bag construction.
Bottom of Bag
Note: Pm in the 1st st of each rnd to keep track of where the rnd begins. The marker will be moved up after the 1st st of the rnd is worked and will be removed when the last rnd of the bottom has been completed.
Rnd 1: Ch 2, 6 sc in the 2nd ch from hook. < 6 sc >
Rnd 2: Sc inc in each st around. < 12 sc >
Rnd 3: (Sc inc, sc in the next st) around. < 18 sc >
Rnd 4: (Sc inc, sc in the next 2 sts) around. < 24 sc >
Rnd 5: (Sc inc, sc in the next 3 sts) around. < 30 sc >
Rnds 6-20: Continue working in the established pattern (adding 1 sc between increases each rnd) until there are 18 sts between increases for a total of 120 sts in Rnd 20. At the end of Rnd 20, join with slip st to beg st of rnd.
Remove marker and do not fasten off.
Proceed to Body of bag.
Body of bag
Note: To make the body of the bag, complete Mesh Section 1, attach the ring of bag motifs, then continue with Mesh Section 2 + Top border.
Mesh Section 1
Rnd 1: Ch 1, sc BLO in the next st and in each st around, join with slip st to beg sc. < 120 sc >
Rnd 2: Ch 4 (counts as dc and ch 1), sk st, * dc in the next st, ch 1, sk st; rep from * around, join with slip st to 3rd ch of beg ch-4. < 60 dc, 60 ch-1 sp >
Rnd 3: Slip st into the ch-1 sp, ch 4 (counts as dc, ch 1), * dc in the next ch-1 sp, ch 1; rep from * around, join with slip st to 3rd ch of beg ch-4.
Rnds 4-8: Rep Rnd 3.
Rnd 9: Ch 1, sc in the same st and in each st and ch-1 sp around, join with slip st to beg st. Fasten off. < 120 sc >
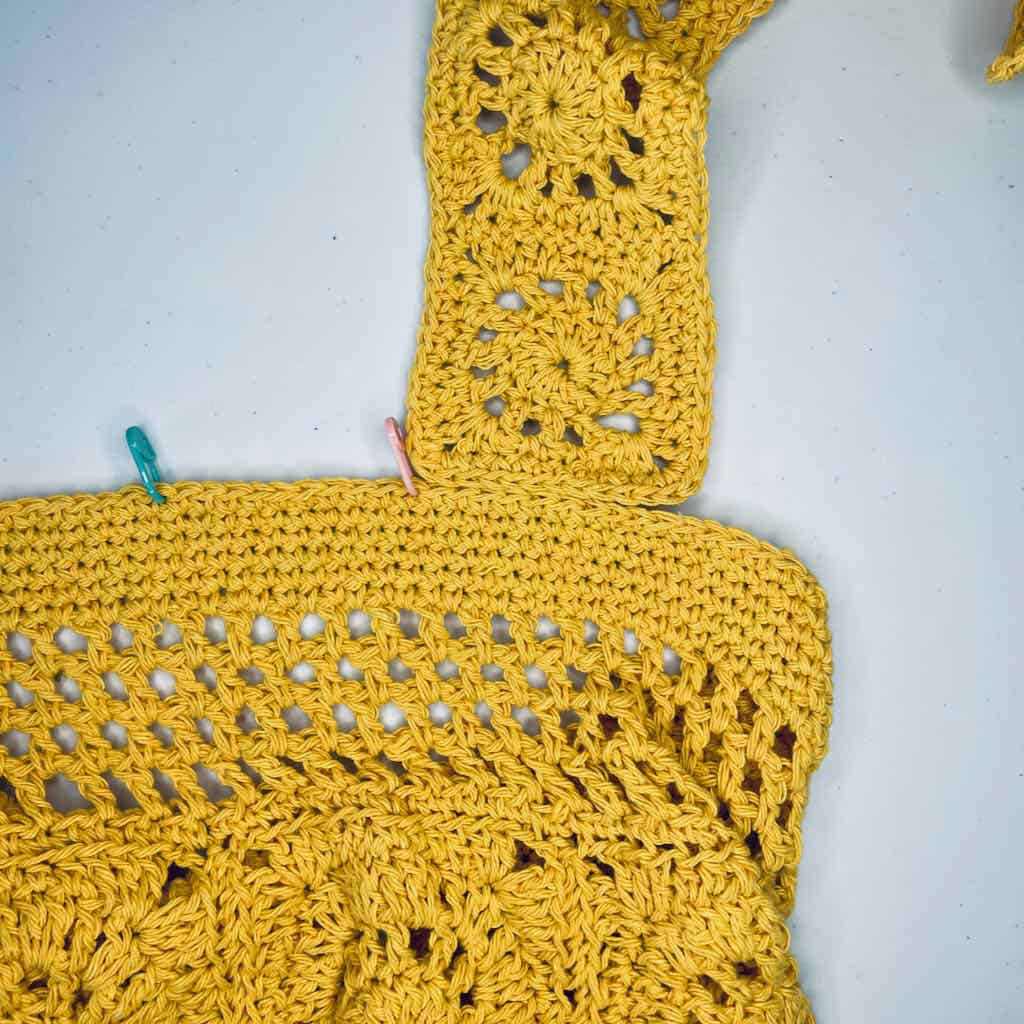
Attach bag motif strip to body of bag.
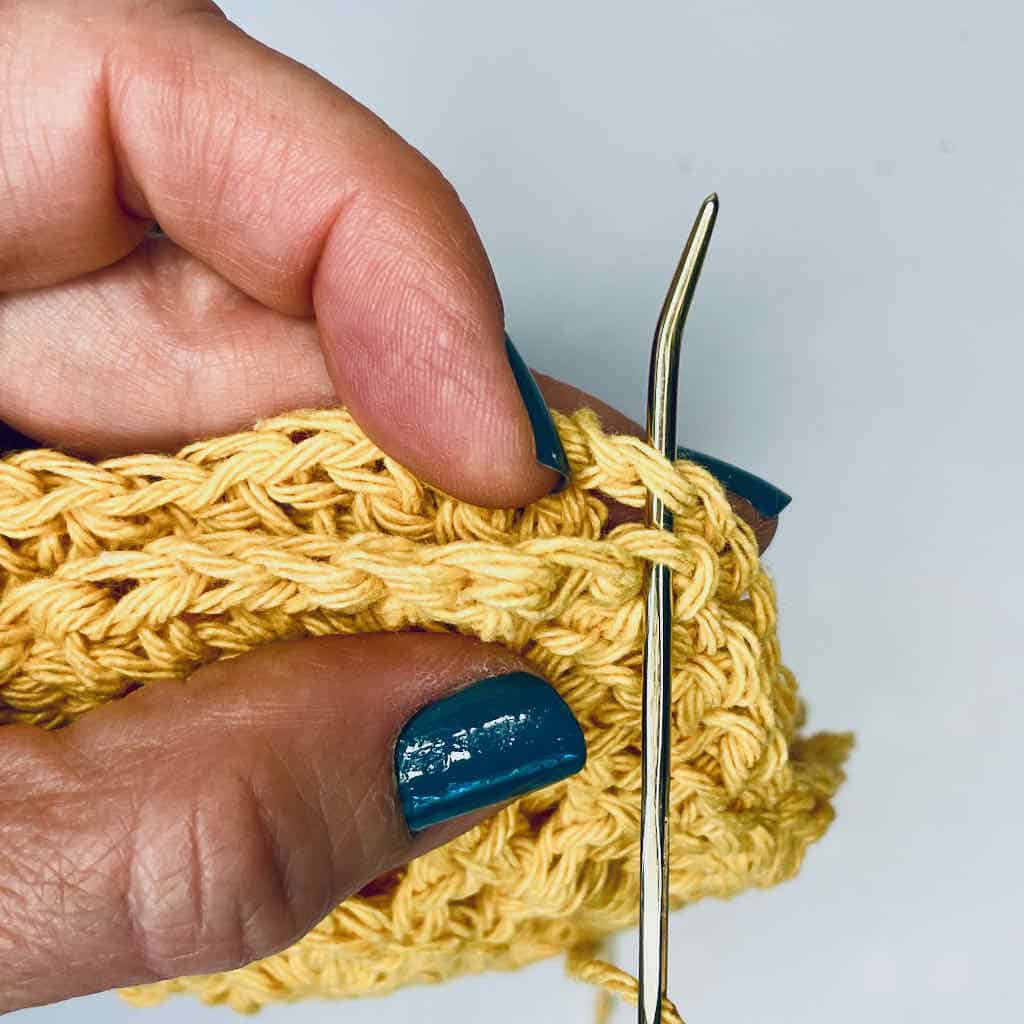
With right sides together, sew one edge of motif ring to the top edge of Mesh Section 1, catching only the top loop of each piece so that the seam lays open flat. I used a slip st to crochet these edges together (on the wrong side) because it’s difficult to cut a piece of yarn long enough to whip st around the entire bag; however, if you prefer to whip st, the look of the bag will be the same.
Proceed to Mesh Section 2
Mesh Section 2 + Top border
Rnd 10: Along the unworked top edge of the ring of motifs you just seamed to the bag, attach yarn in the middle st of any motif. Ch 1, sc BLO in the next st and in each st and ch-1 sp around. At each of the seams, be sure to work a sc on either side of the seam as well as a sc in each chain space on either side of the seam. Join with slip st to beg st. < 120 sc >
Rnd 11: Rep Rnd 2 of Mesh Section 1.
Rnds 12-14: Rep Rnd 3 of Mesh Section 1.
Rnd 15: Ch 1, sc in the same st and in each st and ch-1 sp around, join with slip st to beg st. < 120 sc >
Rnds 16-20: Ch 1, sc in the same st and each st around, join with slip st to beg st. < 120 sc) >
Fasten off and weave in ends. The body of the bag is now complete!
Strap Motifs – Make 16, 8 for each strap.
Rnds 1-2: Rep Rnds 1-2 of the bag motif.
Rnd 3: Ch 1, hdc in the same st, sc in the next (ch-1 sp, dc and ch-1 sp), hdc in the next st, (2 hdc, ch 2, 2 hdc) in the next ch-1 sp, * hdc in the next st, sc in the next (ch-1 sp, dc and ch-1 sp), hdc in the next st, (2 hdc, ch 2, 2 hdc) in the next ch-1 sp; rep from * around, join with slip st to beg hdc. Fasten off.
Assemble strap – Make 2 (8 motifs each)
With right sides together, sew 8 of the strap motifs together end to end in a single row. Use a simple whip st, catching both loops of each square as you seam.
Strap edging
Attach yarn in any st along one side. Ch 1, sc in the same st, sc in each st around, working a sc on each side of the motif seam (but not into the seam as you did for the bag motifs) and 2 sc in each ch-2 corner sp. Join with a slip st to beg st and fasten off.
Block each strap. In order for the straps to have straight edges and lay flat, I highly recommend wet or steam blocking. The finished measurement for each strap is approx. 23” x 3” after blocking.
Attach the straps to bag
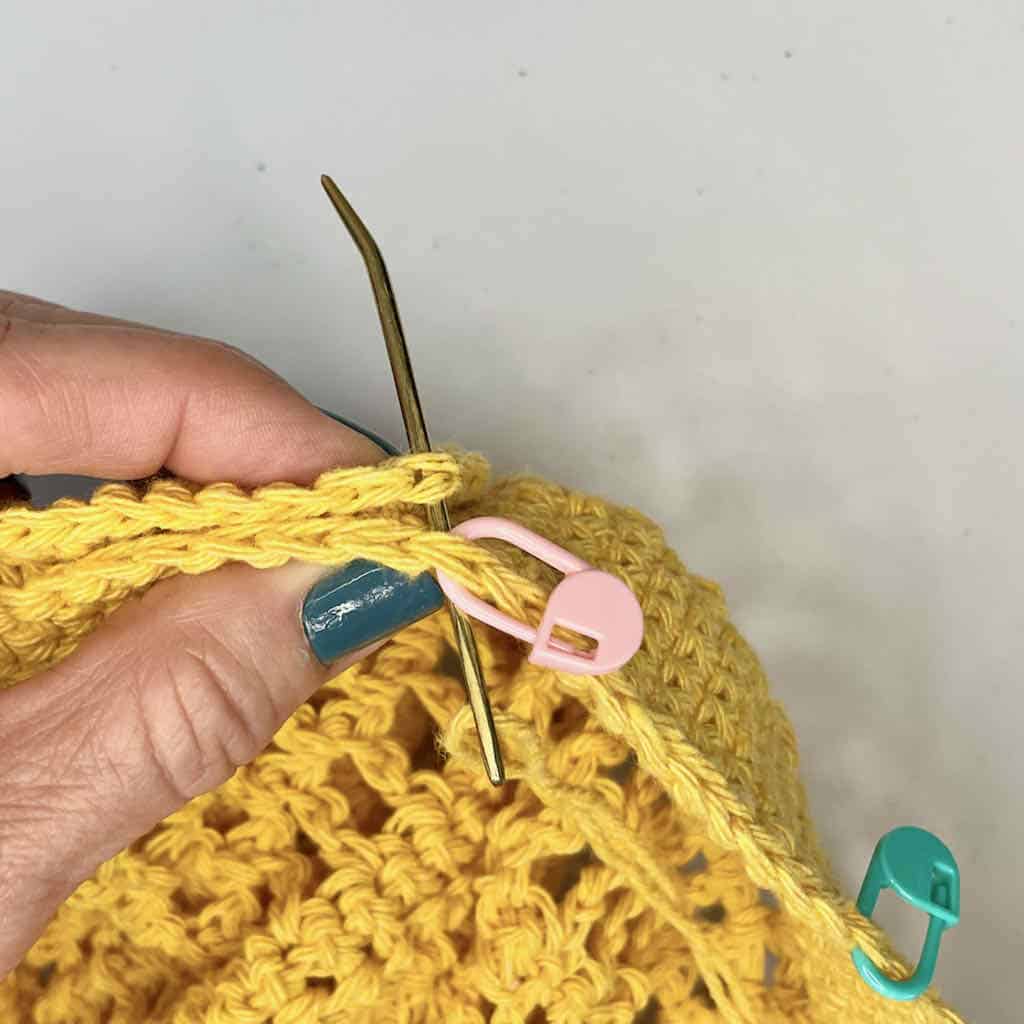
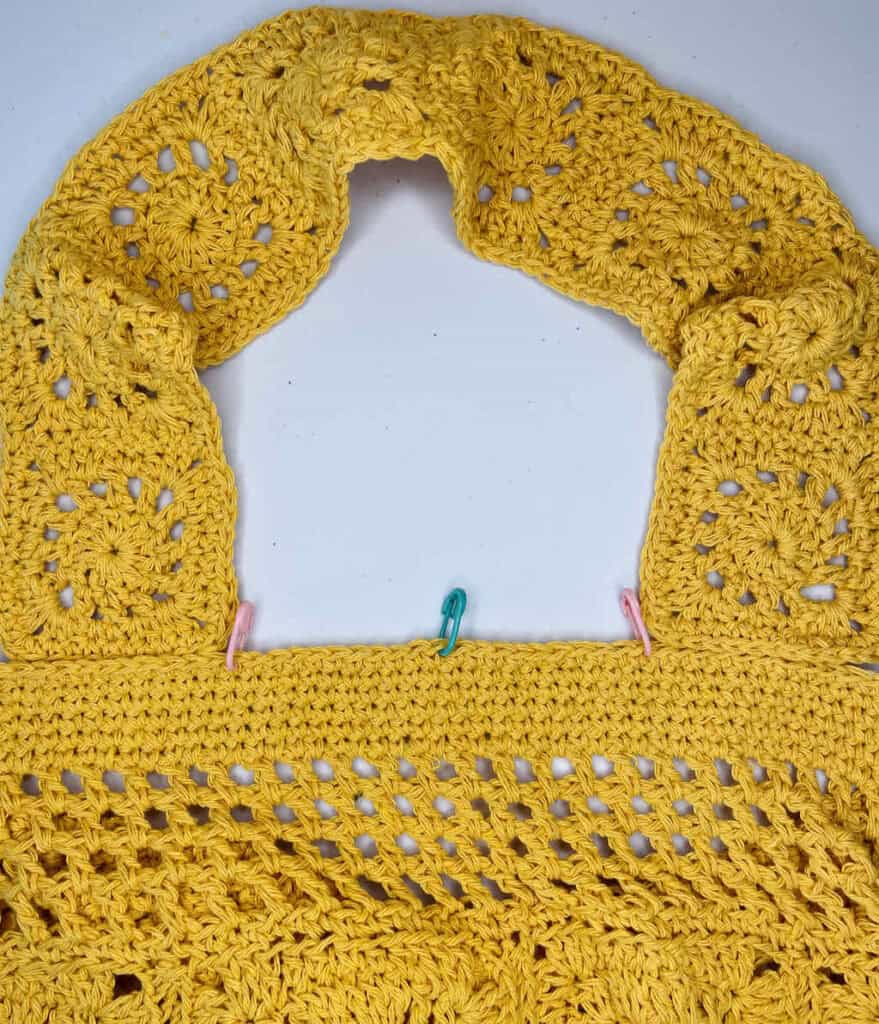
Step 1: To find the placement for the strap ends, fold the bag in half. Pm at each side edge, with 59 sts between markers.

Step 2: With one marker facing you, count 10 sts to the right (pm in 10th st) and 10 sts to the left (pm in the 10th st) – See Figure 1. Line up the outside edge of the strap with the right most marker and, with right sides together, sew the strap to the bag, moving toward the center of the bag as you stitch – See Figure 2.
Figure 1
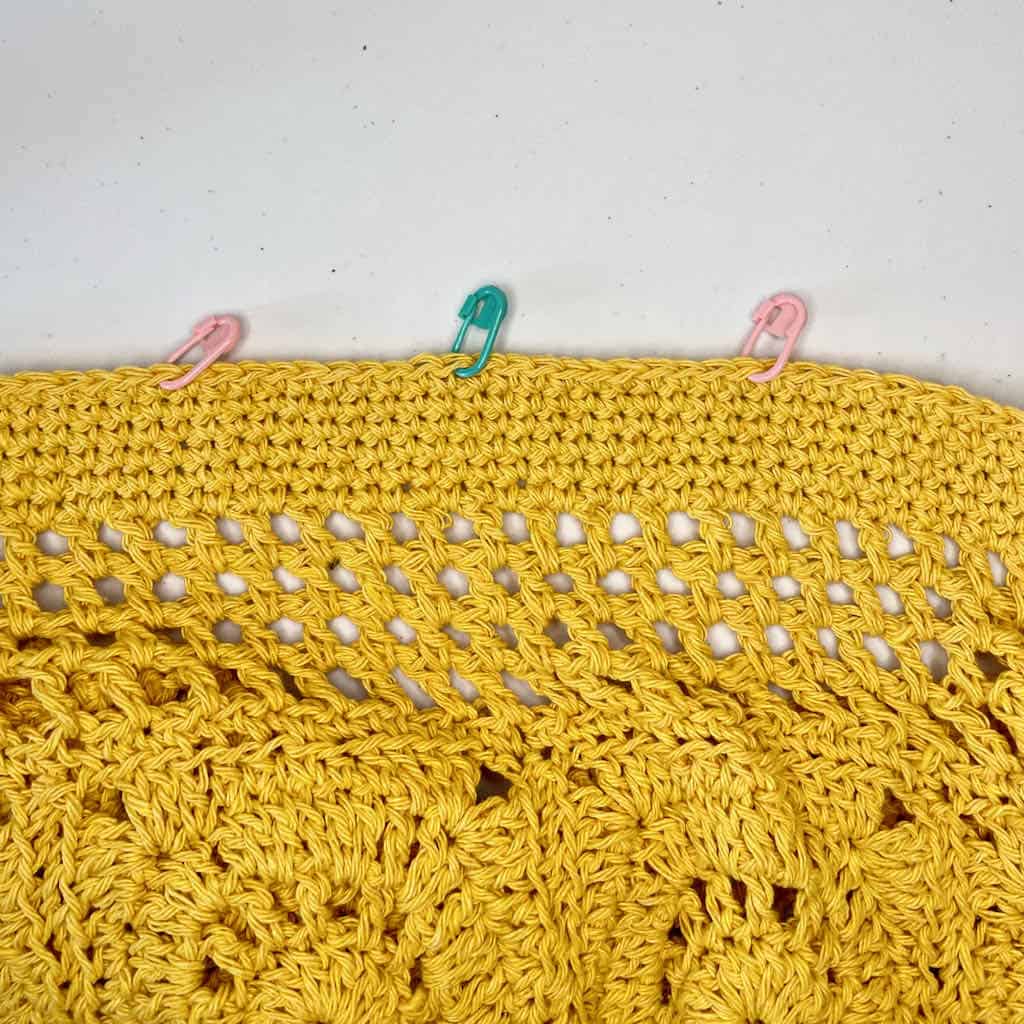
Figure 2
Sew through both loops when attaching the straps
Step 3: With right sides together, sew the other end of the strap (being careful not to twist) to the opposite side of the bag, lining up the outside edge of the strap with the left most marker.
Rep for the second strap. Weave in all ends.
That’s a wrap! Enjoy your Sunny Day Market Bag on your next shopping trip!
I hope you enjoy making this wonderful bag. Post your pictures on Instagram with the #sunnydaymarketbag. I’d love to see your makes out and about!
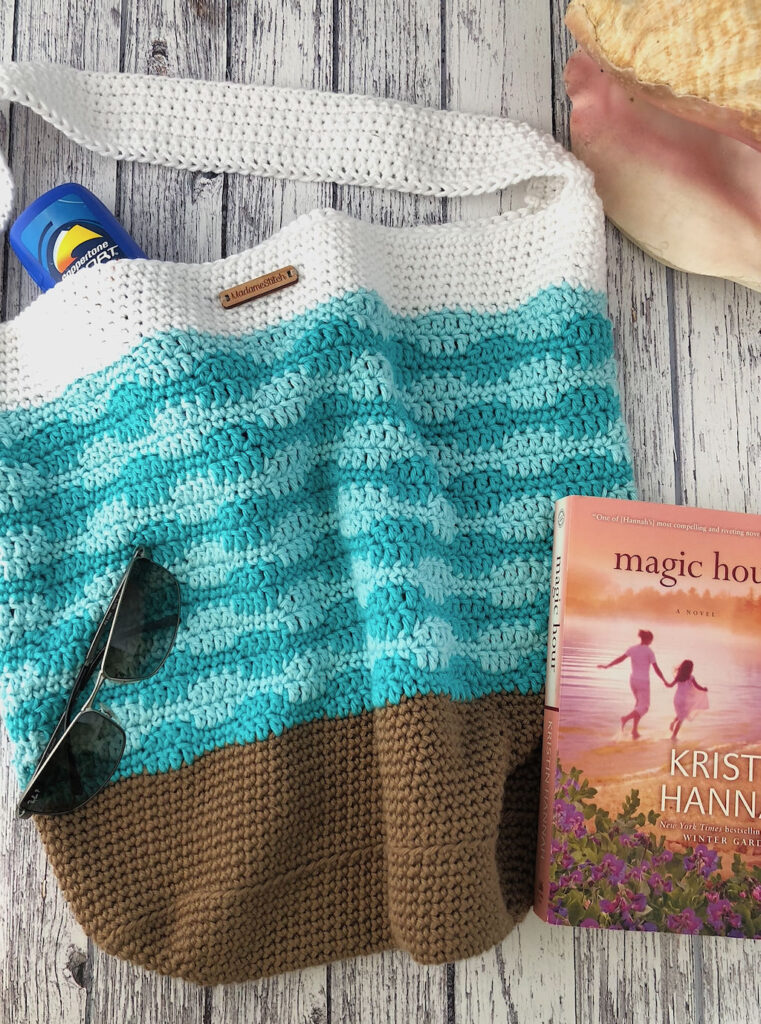
If you’re looking for more bags to make…
Visit my Ravelry store to get the patterns for these beauties!
4 Comments