Anxiety-inducing crochet gauge: Why you should love it
This is Part V in the series “How to Read Crochet Patterns”
I’m just gonna put it right out there – I hate to deal with crochet gauge. It seems to be this elusive monster hanging over my head when, really, I just want to get at making the project. I suspect most of my angst comes from the fact that I was never really taught about gauge and how to get it. But, as I’ve become more adventuresome over the years with the projects I choose, I’ve had to come to terms with this important aspect of crochet.
What is crochet gauge anyway?
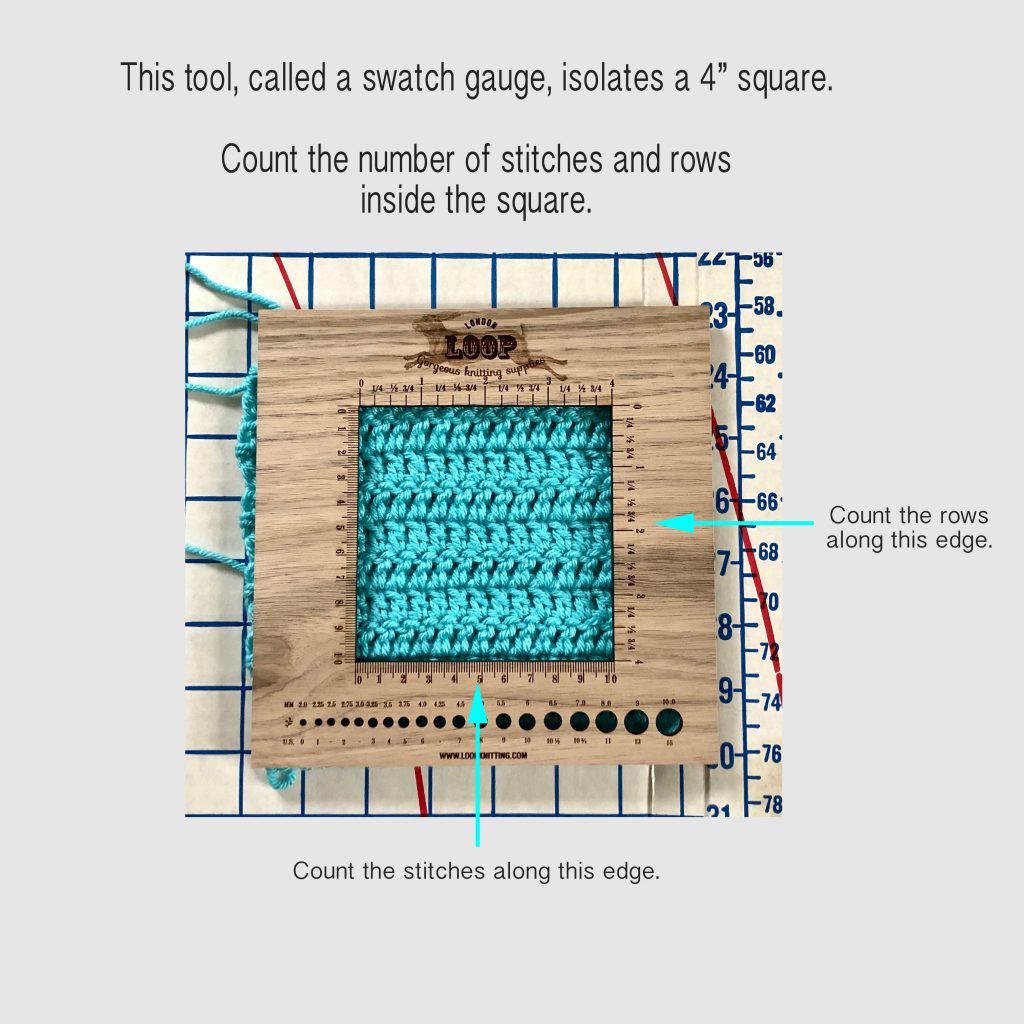
The definition of gauge is literally the number of stitches and rows per inch or, in other words, how tall and how wide your stitches are. A gauge swatch is usually measured 4″ square with the stitches and rows per inch determined by counting the number of stitches and rows within that 4″ square, then dividing by 4.
Why is gauge important?
The most important reason is that achieving gauge means your fitted garment will fit. Or, your project will be the same size as the one in the pattern. Yes, for some projects, gauge just doesn’t matter, or matters so little that it isn’t worth the time and effort. But, honestly, why take the chance? Do that gauge swatch and all the uncertainty goes out the window.
Keep in mind that every crocheter has a unique way of stitching. That doesn’t make you wrong or right, simply unique. As a general rule, your stitches may be tighter or looser than someone else’s. I discovered that my stitches are more compact, so my row gauge is usually off. In order to exactly match what the designer has called for in a pattern and make your FO look like the picture, you won’t be able to skip the important step of making a crochet gauge swatch.
What if you’re working on a project that came as a kit? You probably won’t be able to get more yarn, so you need to be sure your stitches and rows are the right size. In this case, making a gauge swatch is a critical step not to be skipped.
How to make a gauge swatch
Making your swatch is relatively easy. You need to know a few things before you get started:
- Start with the size crochet hook and yarn called for in the pattern. If you’ve substituted a yarn, try to pick something in the same weight and one that has the same characteristics as the yarn used in the pattern.
- Does the designer ask for crochet gauge to be achieved using a specific stitch (such as “double crochet”) or is it to be worked in the stitch pattern used for the project? This will be specified in the gauge section of the pattern.
- While the measured area should be 4″ square, the recommended size for a swatch is 5-6″ square. The stitches along the edges of a swatch can pull or be skewed, so your 4″ swatch will be measured in the center of the square rather than along the edges.
- To determine how wide to make your swatch, chain 5-6 times the number of stitches per inch, plus 1 or 2 chains to begin. Work in rows until your swatch measures 5-6″.
Practice swatch
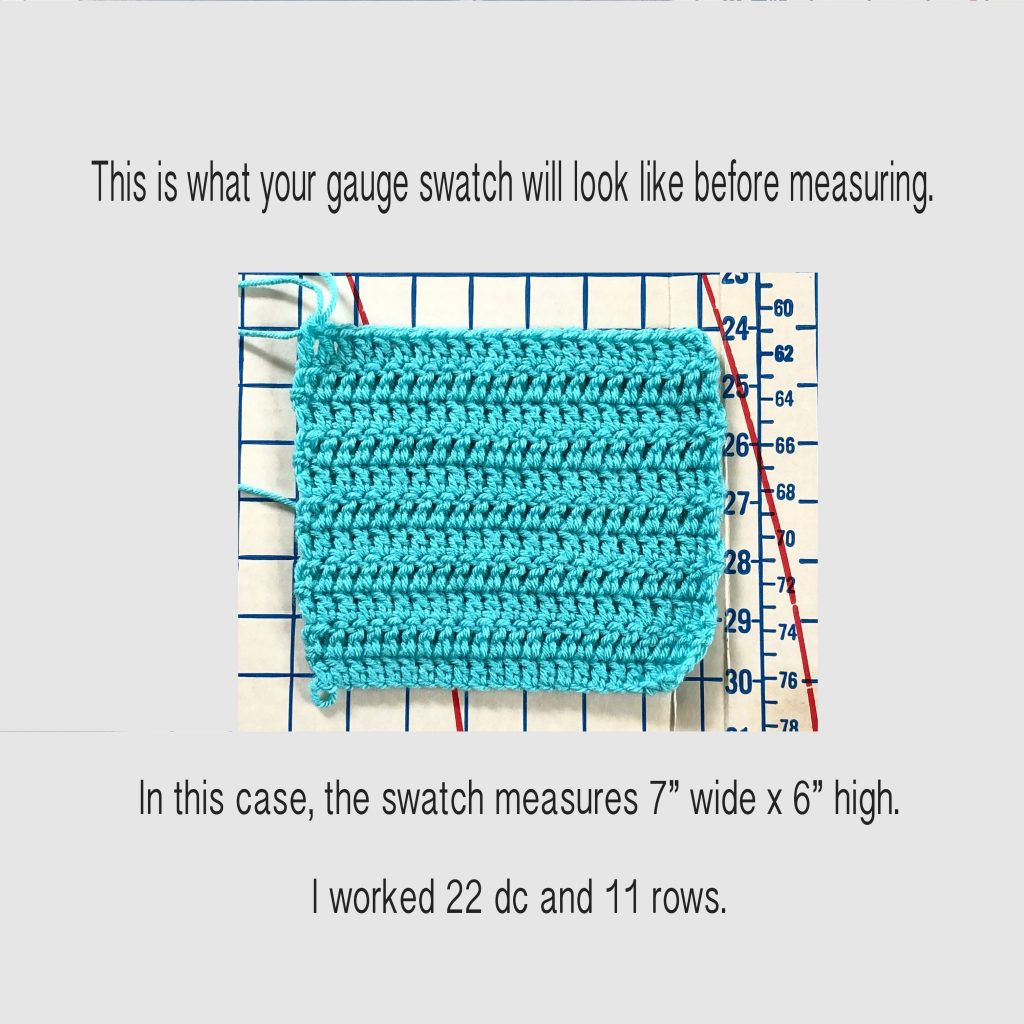
OK, let’s get started! Grab some worsted weight yarn and a size US I-9 hook. For this swatch, I used Hobby Lobby’s I Love This Yarn and worked in double crochet.
- Foundation chain: Ch 23.
- Row 1: Double crochet in the 3rd chain from the hook and in each chain across; turn. (22 dc)
- Row 2: Ch 2 (counts as dc), dc in next st, in each st across, and in the turning ch; turn. (Maintain 22 dc for each row)
- Repeat step 3 until your piece measures 5-6″ from the lower edge.
Measure the gauge swatch
How to adjust gauge
Once you’ve measured for gauge, determine how close you are to what the designer has specified. In the case of our practice swatch, the gauge is 13 dc x 7 rows = 4″.
If your width is incorrect…
Change the size of your hook accordingly. In other words, if you have too few stitches per inch, change to a smaller hook. Switch to a larger hook if you have too many stitches per inch.
If your height is incorrect…
Here’s where it gets a bit tricky and where being that unique crocheter might prove difficult in achieving gauge. To adjust your row height, you’ll need to adjust the Golden Loop.
What is the Golden Loop? It’s the first loop you pull up after inserting your hook into the next stitch. In other words, it’s the first step of every new stitch. For example, to work a double crochet, the instructions might say, “yarn over, insert hook into the next stitch, yarn over, pull up loop, yarn over, pull through 2 loops, yarn over, pull through 2 loops.” The Golden Loop is the part where you “pull up a loop”. The height of that loop determines the height of each row.
Here are a couple of tutorials that might help you see more clearly how to adjust the Golden Loop:
- Knit and Crochet Ever After has a great tutorial that explains the Golden Loop and how you can change it to adjust the height of your rows.
- Another helpful tutorial is produced by Scheepjes.
Start your journey here
Sign up for the email series and you’ll get basic information about how to read crochet patterns sent right to your inbox. Click the graphic below and get started!
That’s a wrap!
Crochet gauge can be tricky to figure out if you’ve never done it before but, like everything else, practice makes it at least a little easier if not perfect. Remember, it’s especially important when working with fitted garments or when substituting yarn. I hope this tutorial has made this step just a bit easier for you!



I would love to learn how to read a graph if that is something you could share. I would be greatly appreciative. I can crochet anything if I have a pattern, but give me a graph and I am lost.
Hi Melissa!
I totally understand. I’ve just started working with graphs to work with C2C projects. What kind of project are you looking to make using a graph?
Thanks for the topic suggestion. My plate is full until January but I will certainly try to get a tutorial up about graphs!
-Debbie
My gauge was 1 stitch off with the 5.5 using the same yarn or red heart I can’t remember which it is..lol
Do I need to completely redo the swatch again? Also, do I have to launder the swatch?
Diana,
If you want to get the gauge exactly, you might need to change hook size. Otherwise, it depends upon what you’re making as to whether you need to meet gauge exactly.
If the designer doesn’t indicate in the pattern about laundering the gauge swatch, that’s really up to you.
Best,
Debbie
The download has a problem. Each time I try to download, I get a message: “No preview available. File is in owner’s trash”. This has happened for the last three parts of this “6 Day Journey”.
I’m really sorry the links didn’t work. I’ve fixed all of them and double-checked. The links should now take you to the correct document.
Thanks so much for your patience!
-Debbie