Crochet a special granny square gift card holder for a personalized gifting experience
A granny square gift card holder will add a personal handmade touch for any occasion. It’s beautiful AND functional at the same time!
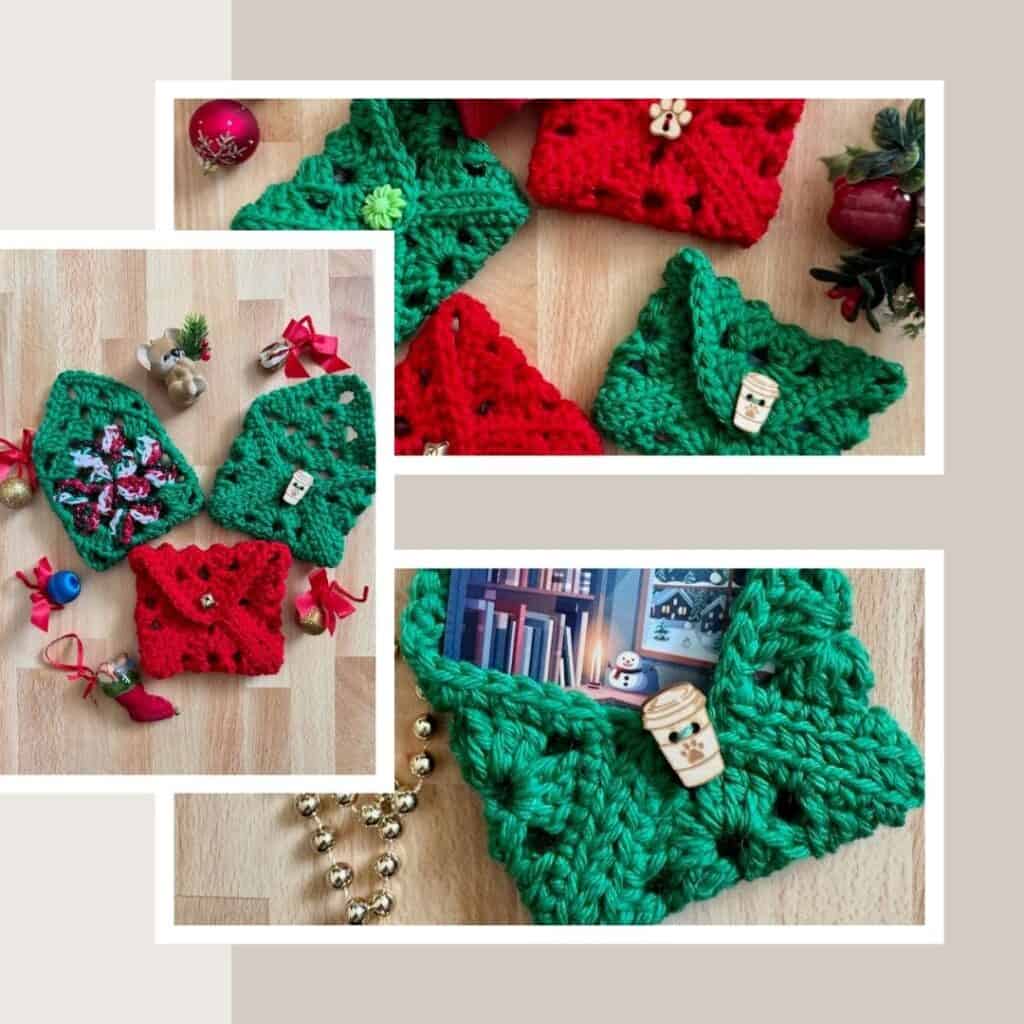
Granny Square Gift Card Holder
Here’s some real talk: shopping for the perfect gift can be tricky. You want to show you care, but you also want your gift to be something the recipient will actually use and love. Enter: the mighty gift card.
Now, I know some of you may equate a gift card to giving cash. It seems rather impersonal, doesn’t it? However, a gift card empowers the recipient to choose something that truly sparks joy, especially if the gift card is to a place he/she really loves.
Gift cards are perfect for any occasion. Birthday? Check. Holiday? Check. Just-because-I-think-you’re-awesome day? Absolutely. Gift cards fit every celebration, from the grand to the everyday, and always bring a smile.
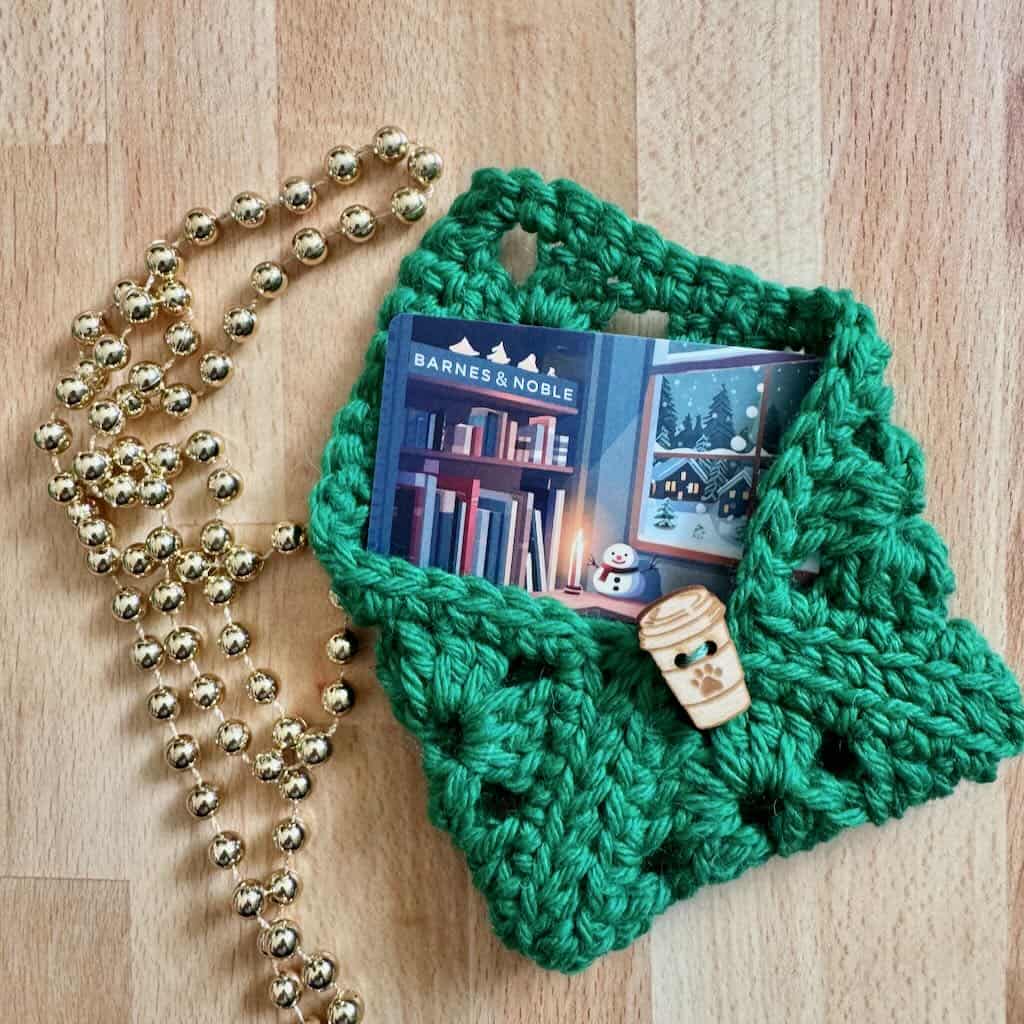
Want to add a personal touch? Put that gift card in a granny square gift card holder. By adding a handmade touch, the recipient will know how much you really care!
Design + Construction
What could be simpler than a basic granny square? If you love making a traditional style granny square as much as I do, you’ll have no trouble with this granny square gift card holder.
Start by working a 4 round basic granny square that’s finished off with a round of single crochets. They’re so quick you can make multiples in one sitting.
Once you have the granny square finished, you’ll fold and seam it in a way that makes it look like an envelope.
Close the granny square gift card holder with a button you have in your stash. Or, use a cute jingle bell like I did. Personalize the closure to your recipient’s special interest.
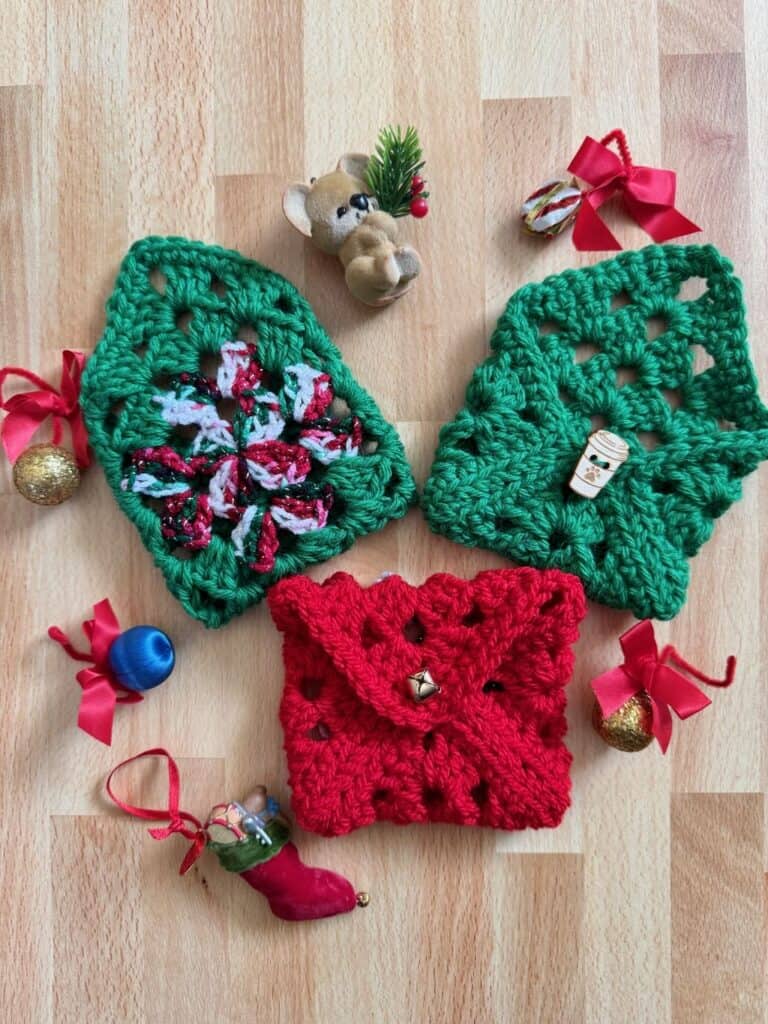
If the gift card is for a book store, add a fun book-themed button. Does the recipient love pets? Find a button that celebrates the recipient’s pet?
This quick and easy granny square gift card holder will have the recipient ooh-ing and ahh-ing!
The Yarn
Looking for the perfect stash buster? This granny square gift card holder is the perfect solution. No need to buy a new batch of yarn because you probably have what you need right at home.
I made mine with worsted weight yarn. But, you can choose any weight you want. That’s the beauty of working with a granny square. Work as many rounds as it takes to get to the size you need.
Personalize your granny square gift card holder by choosing colors the recipient loves. Because this project is so quick to make, you’ll find it easy to take the time to make your granny square gift card holder extra special.
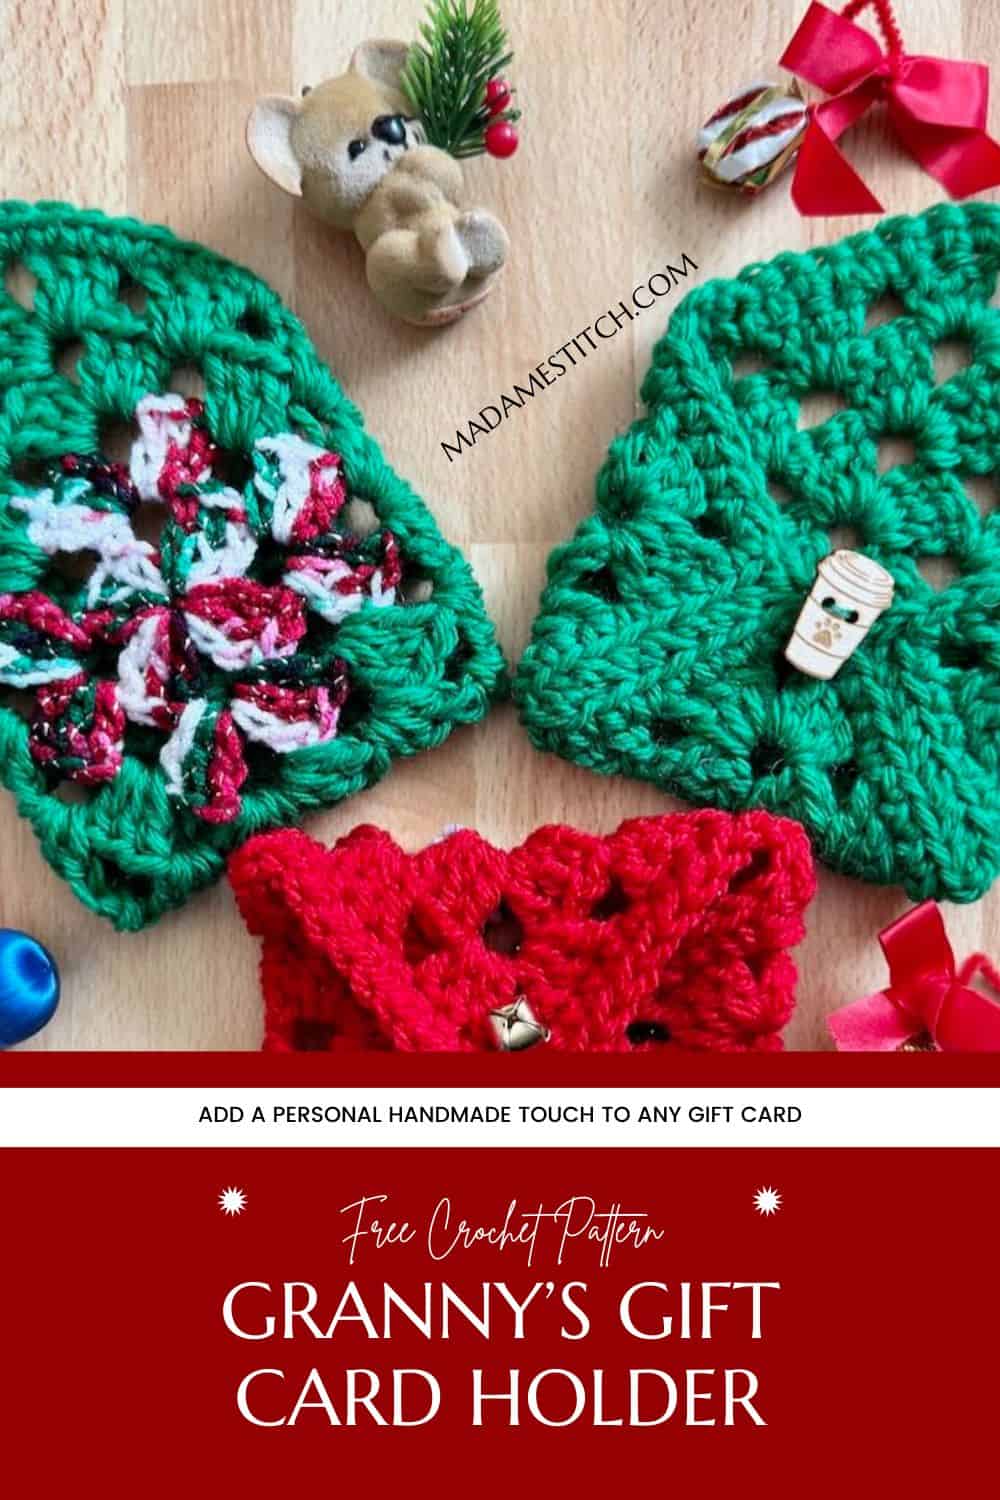
Where to get the PDF for this granny square gift card holder
The Granny’s Gift Card Holder is a free crochet granny square pattern in this blog post for blog subscribers. Scroll down to view the free version.
Upgrade your experience with a printer friendly and downloadable premium PDF that can be purchased from one of my shops.
The premium PDF can be uploaded to your favorite mobile device so you can take your granny square gift card holder project with you to work on whenever you’re out and about.
The PDF is easy to read and beautifully formatted without ads for a great experience. You’ll get helpful photos for every step of assembly and finishing
Get your copy today!
Granny’s Gift Card Holder Free Pattern Starts Here
General Information
Yarn
Any worsted weight yarn – use your scraps!
You’ll need approx. 60-70 yds of worsted weight yarn. Choose any weight yarn you like, although anything heavier than worsted weight will probably be too thick.
Hook
US size H-8 (5mm)
Tools + Materials
- Button or bell (approx. .75-1″ in diameter) (I got my wooden buttons from Kathies Kozies on Etsy)
- Matching thread to sew on the button
- Tapestry needle for sewing the seam
Finished Size
Approx. 3.25″ x 4.25″ with the flap closed
Gauge
The completed granny square measures approx. 5.25-5.5″ across before seaming
Skill Level: Advanced Beginner
Abbreviations – US crochet terminology
- beg – beginning
- ch – chain
- dc – double crochet
- rnd – round
- sc – single crochet
- sp – space
- st(s) – stitch(es)
- YO – yarn over
Repeats
- (…) – Work everything within the parentheses in the same st or sp
- […] – Repeat everything within the brackets the indicated number of times
- {…} – Repeat everything within the braces the indicated number of times
Special Stitches
Granny stitch (GS) – 3 dc in the same sp
Stacked single crochet (STsc) – (This stitch is used at the beginning of a row or round to replace the traditional turning ch-3. It has the appearance of a dc.) – Insert hook in the same st as the loop, YO, pull up a loop, YO, pull through 2 loops (bottom sc made), insert hook in the left vertical bar of the bottom sc, YO, pull up a loop, YO, pull through 2 loops (top sc made).
Pattern Notes
- Do not turn after any round. The right side of the square will always be facing you unless otherwise stated.
- A ch-2 or ch-3 may be substituted for the STsc at any time without altering the construction of the square.
- The granny square can be worked in one color. If you choose to change colors, drop the working yarn and pick up the new color to join with a slip st.
Written Instructions
Making the Square
Ch 4, join with slip st to form ring.
Rnd 1: (STsc, 2 dc) in the ring, ch 3, [GS in the ring, ch 3] 3 times, join with slip st to beg st. < 4 GS, 4 ch-3 corner sp >
Rnd 2: STsc in the sp to the right of the hook, ch 1, [(GS, ch 3, GS) in the sh-3 corner sp, ch 1] 3 times, (GS, ch 3, 2 dc) in the same ch-3 corner sp as the STsc to complete the 1st corner, join with slip st to beg st. < 8 GS, 4 ch-1 sp, 4 ch-3 corner sp >
Rnd 3: Slip st into the ch-1 sp, (STsc, 2 dc) in the same sp (counts as a GS), ch 1, [(GS, ch 3, GS) in the ch-3 corner sp, ch 1, GS in the ch-1 sp, ch 1] 3 times, (GS, ch 3, GS) in the ch-3 corner sp, ch 1, join with slip st to beg st. < 12 GS, 8 ch-1 sp, 4 ch-3 corner sp >
Rnd 4: STsc in the sp to the right of the hook, ch 1, GS in the next ch-1 sp, ch 1, {(GS, ch 3, GS) in the corner ch-3 sp, [ch 1, GS in the next ch-1 sp] twice, ch 1} 3 times, (GS, ch 3, GS) in the corner ch-3 sp, 2 dc in the same ch-1 sp as the STsc to complete the 1st GS, join with slip st to beg st. < 16 GS, 12 ch-1 sp, 4 ch-3 corner sp >
Note: Your square should measure approx. 5-5.25″ across at the end of Rnd 4 to be the correct size. Feel free to rep Rnd 4 if you need to before moving on to Rnd 5.
Rnd 5: Ch 1, sc in the same st and in each st and ch-1 sp across to the ch-3 corner sp, [(sc, ch 1, sc) in the ch-3 corner sp, sc in the next st and in each st and ch-1 sp across to the next ch-3 corner sp] 3 times, (sc, ch 1, sc) in the ch-3 corner sp, sc in the next st and in each st and ch-1 sp across to the beg st, join with slip st to beg st. < 17 sc along each side, 4 ch-1 corner sp.
Fasten off and weave in ends.
Assembly/Finishing
Note: Refer to the photo tutorial below.
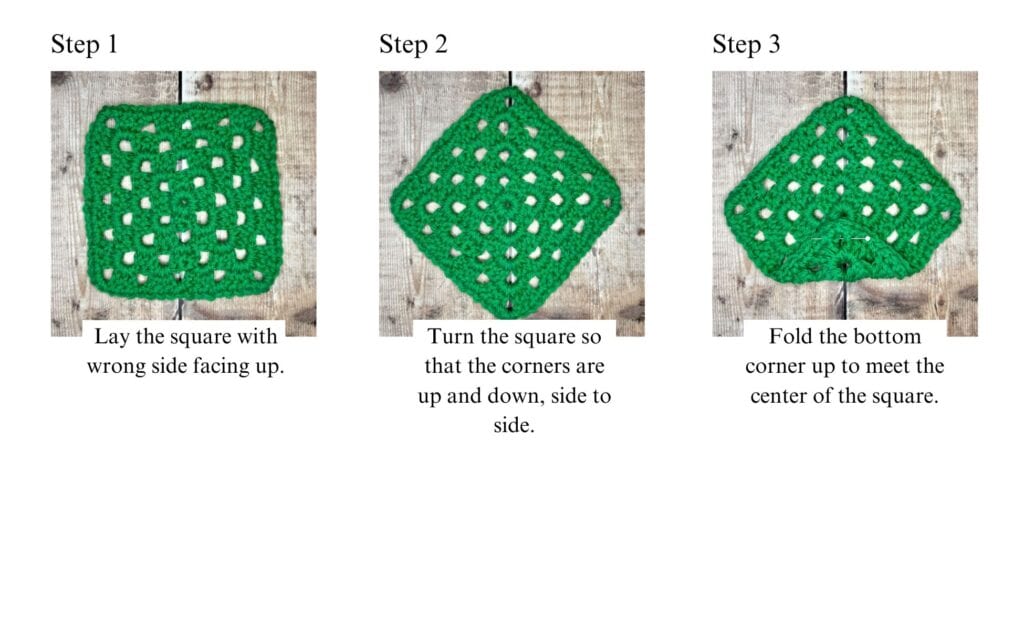
Step 1: Lay the square with the wrong side facing up.
Step 2: Rotate the square so that the corners are up and down, side to side.
Step 3: Fold the bottom corner up to meet the center of the square.
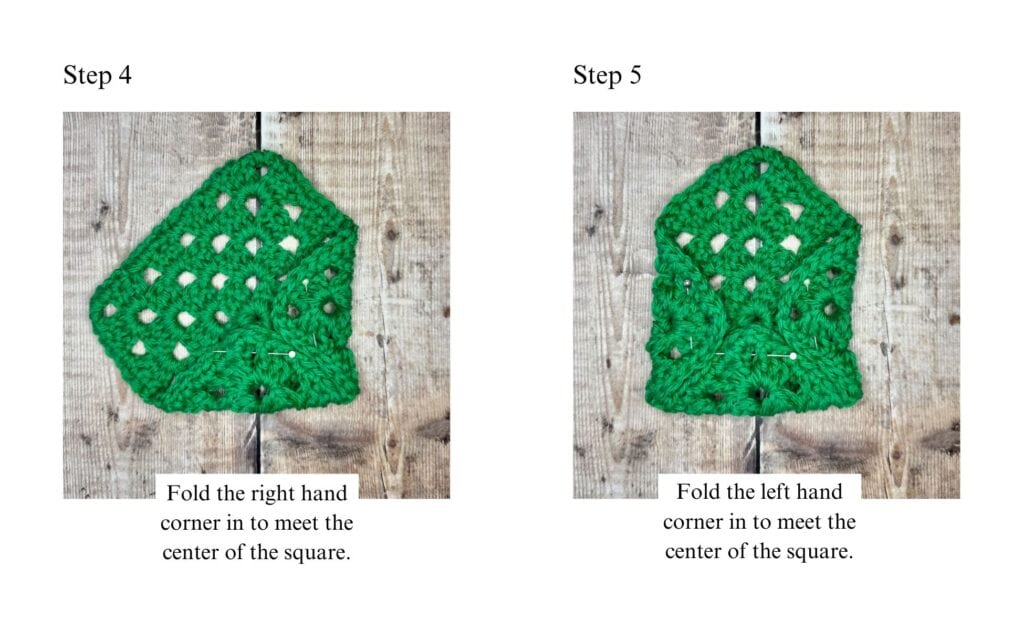
Step 4: Fold the right hand corner in to meet the center of the square.
Step 5: Fold the left hand corner in to meet the center of the square.
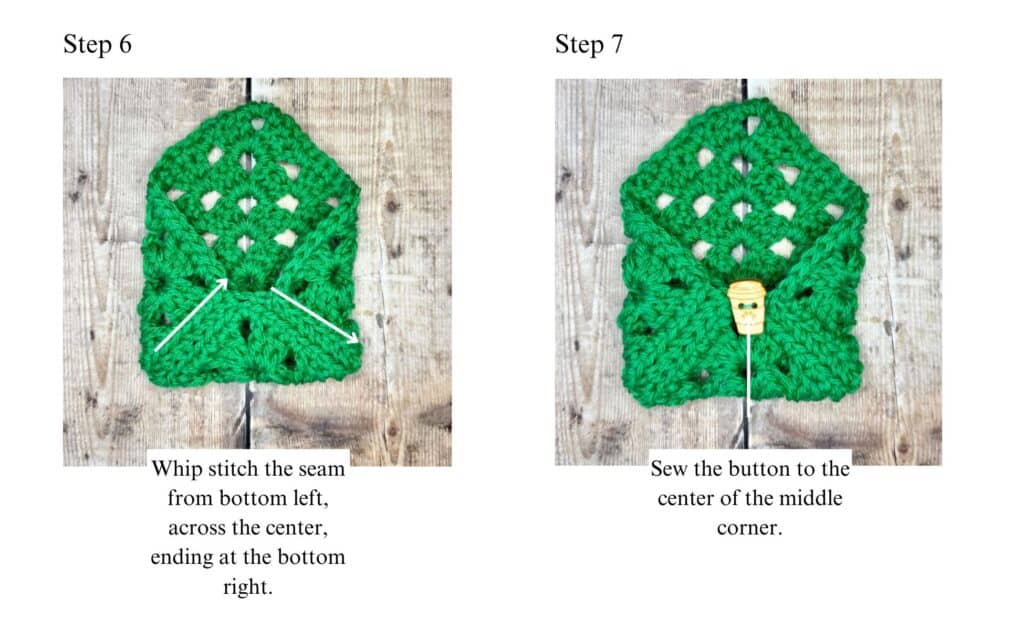
Step 6: Whip stitch the seam from the bottom left, across the center, ending at the bottom right. Turn the envelope inside out to weave in the ends.
Step 7: Sew the button to the center of the pocket of the envelope, aligned with the center of the top flap.
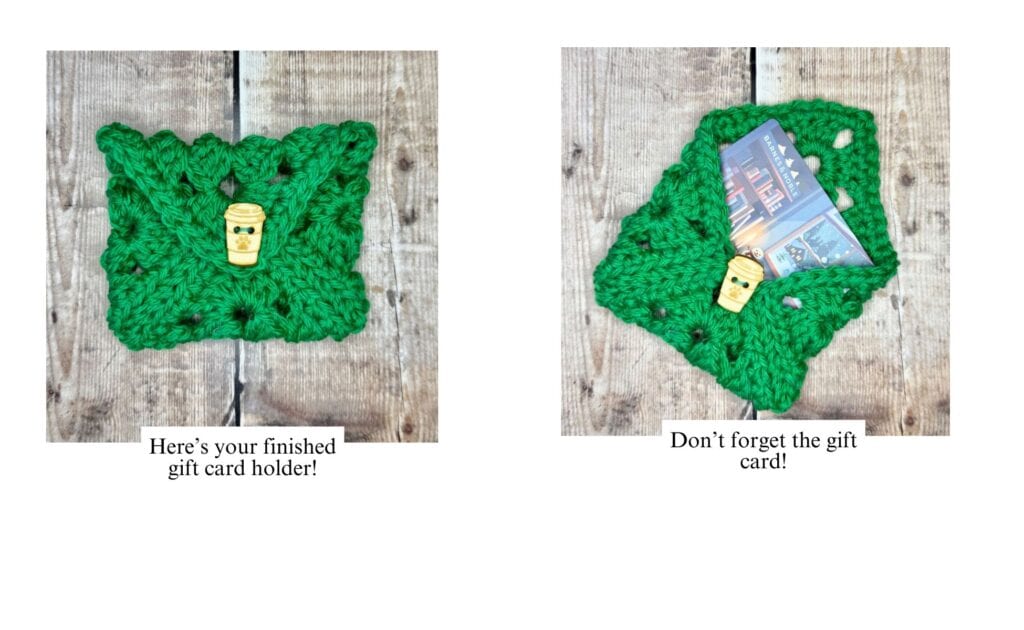
All done! Insert the gift card and surprise the recipient with a wonderful personalized granny square gift card holder!



2 Comments