Easy Bumble Bee C2C blanket square crochet pattern
Crochet this easy bumble bee C2C blanket square with this free crochet pattern. Available on the blog.
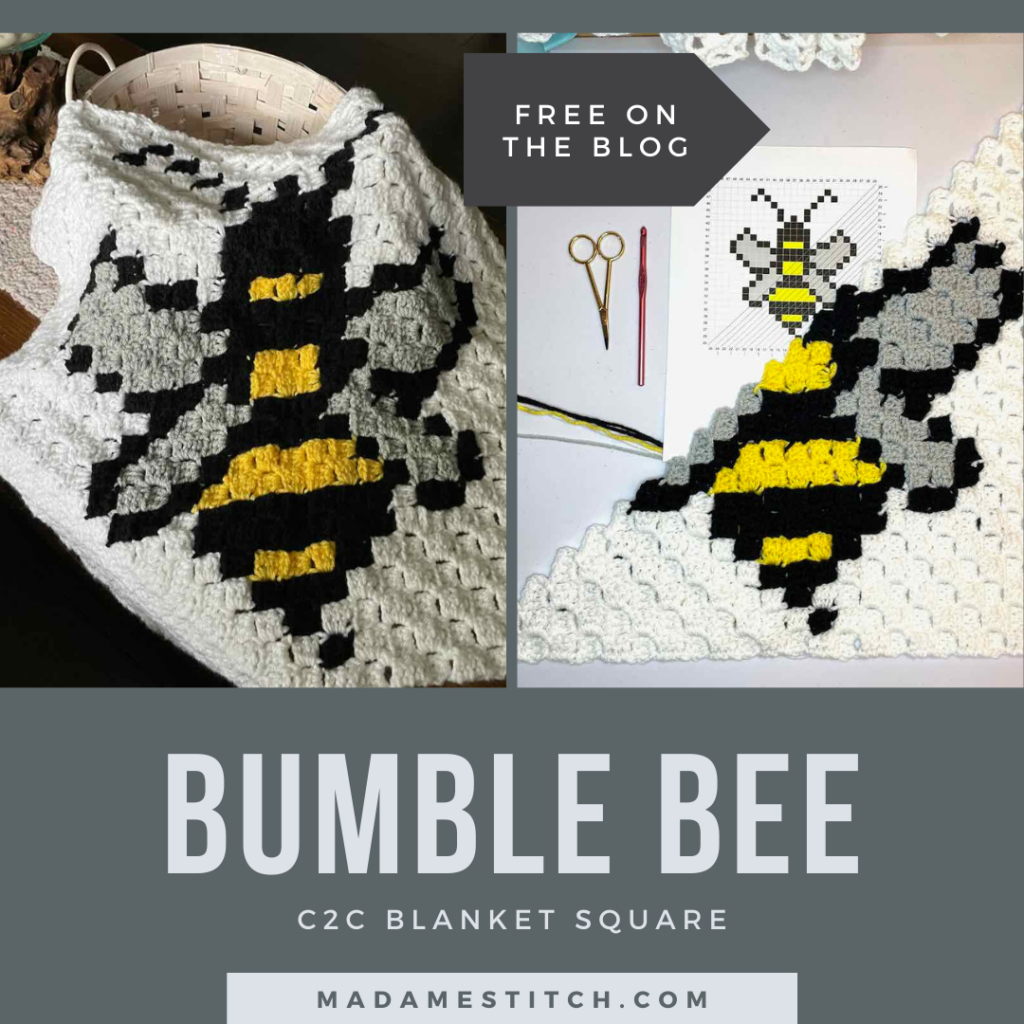
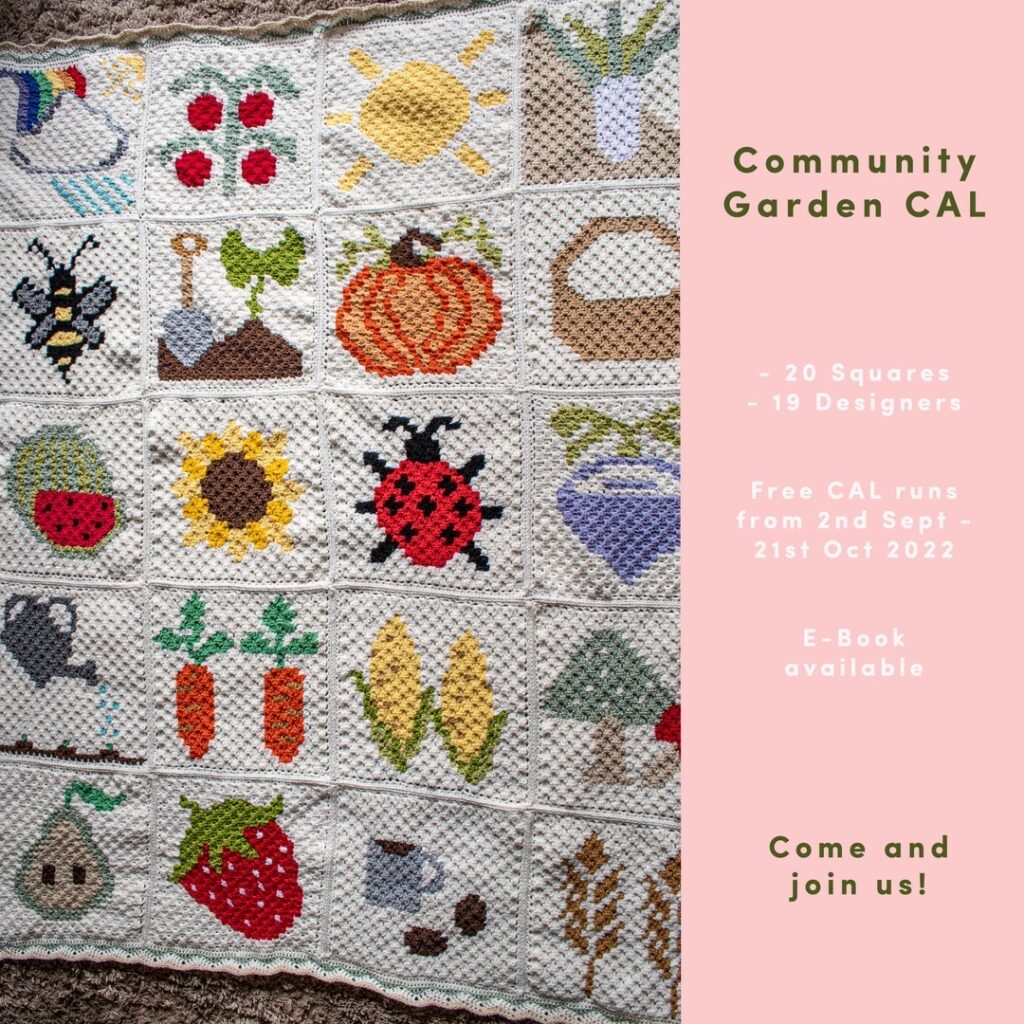
I was asked to design a square for a Community Garden themed blanket CAL and immediately I thought of a bumble bee C2C blanket square.
When I think of my garden, I think of the butterfly bush that attracts loads of bumble bees. Because I don’t have a vegetable garden, I delight in seeing all of the bumble bees, butterflies and hummingbird hawk moths that come visit my bush.
Memorializing my garden view with a bumble bee C2C blanket square was an easy choice. These tiny friends lend such a calming presence to the view of my butterfly bush.
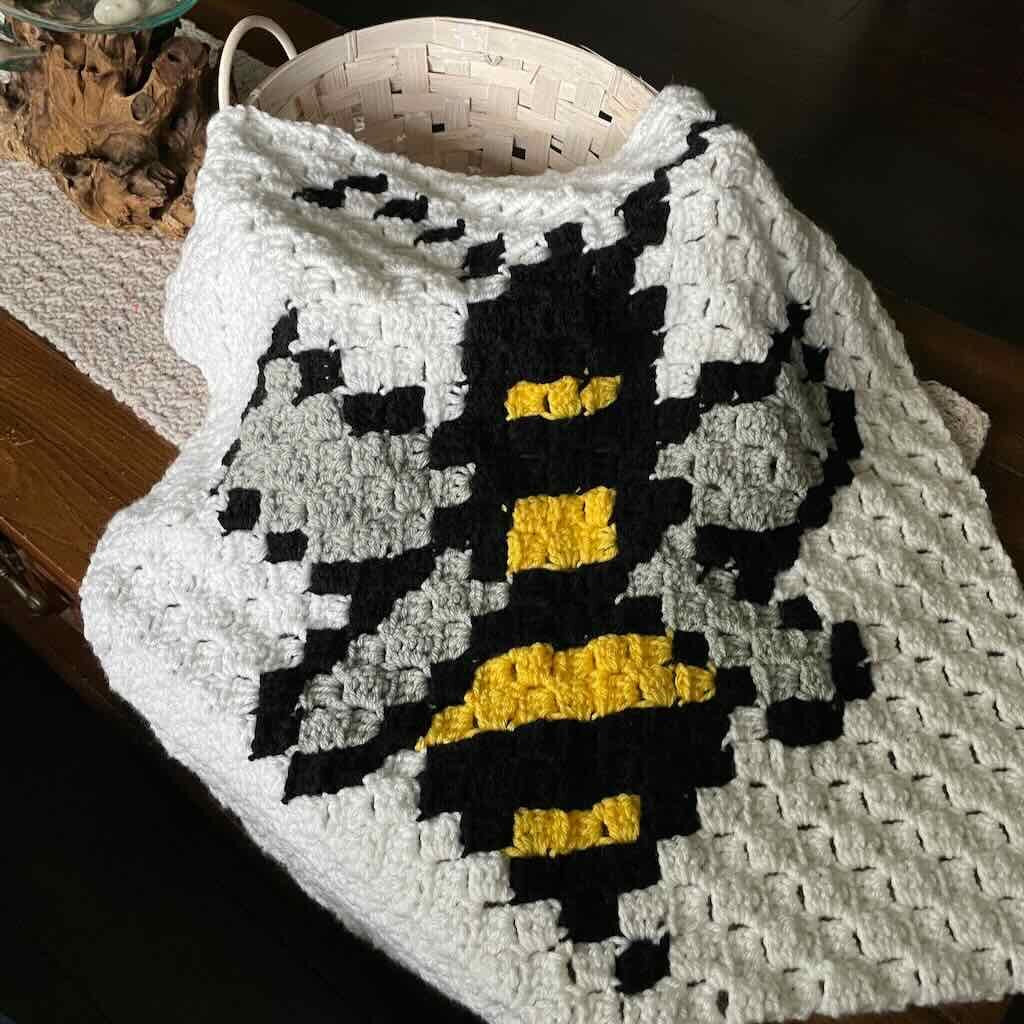
Design + Construction of the Bumble Bee C2C blanket square
The Community Garden Blanket CAL is a collaborative effort hosted by Helen of Sunflower Cottage Crochet. She gathered 20 designers to bring their favorite things in the garden to life in one beautiful blanket. The entire blanket is worked in identically sized C2C squares.
C2C, or corner to corner, crochet is the perfect construction method for creating a picture of a bumble bee. The color work of C2C is an easy vehicle for creatively depicting even the most mundane garden objects.
ABOUT CORNER TO CORNER CROCHET
This pattern uses the C2C (corner to corner) construction technique. If you are unfamiliar with this construction, here is a comprehensive tutorial from Make and Do Crew.
In C2C, each block or tile consists of a ch-3 followed by 3 dc. The ch-3 functions much like a regular turning chain except you aren’t turning; you’re simply bringing your hook up to the start of a new block. This ch-3 then becomes the space in which a new block is worked in the next row.
Except for the final block of an increase row, the (ch 3, 3 dc) will be followed by a slip st that secures the block you just made to the body of the work.
About the Community Garden Blanket CAL
This bumble bee C2C blanket square is the 16th of 20 squares created for the Community Blanket CAL. Now that the CAL is over, you can visit the roundup post for links to all of the squares.
Helen has assembled a beautiful 132-page eBook that includes the patterns for all 20 squares, 4 bonus squares not available anywhere else, a step by step guide to joining the squares and instructions for a beautiful border. The pattern eBook is $12.99 through Oct. 17th, then the price goes up to $15. Click on the graphic below to get your very own eBook.
Instructions for the Bumble Bee C2C blanket square
Thank you for staying on this post and reading my patterns right here on the blog, without copy/pasting. When you stay here to follow the free version of my pattern, I am compensated for my time and energy. This is a great, free way to support a designer. If you would like to save this for later, bookmark the page to save it in your mobile browser.
Yarn
I used Hobby Lobby “I Love This Yarn” 100% acrylic worsted weight yarn for the sample. You may choose any worsted weight yarn and the colors you prefer for your bumblebee. You’ll need approx. 7oz for the entire square.
Color Key
- (A) – White
- (B) – Black
- (C) – Gray
- (D) – Yellow
Hook
US size H-8 (5mm)
Finished Size
25 squares x 25 squares
Abbreviations – US crochet terminology
- ch – chain
- dc – double crochet
- RS – right side
- WS – wrong side
Pattern Notes
- Keep all yarn ends to the wrong side of the fabric.
- This arrow ← means you are reading the chart from right to left and working a RS row.
- This arrow → means you are reading the chart from left to right and working a WS row.
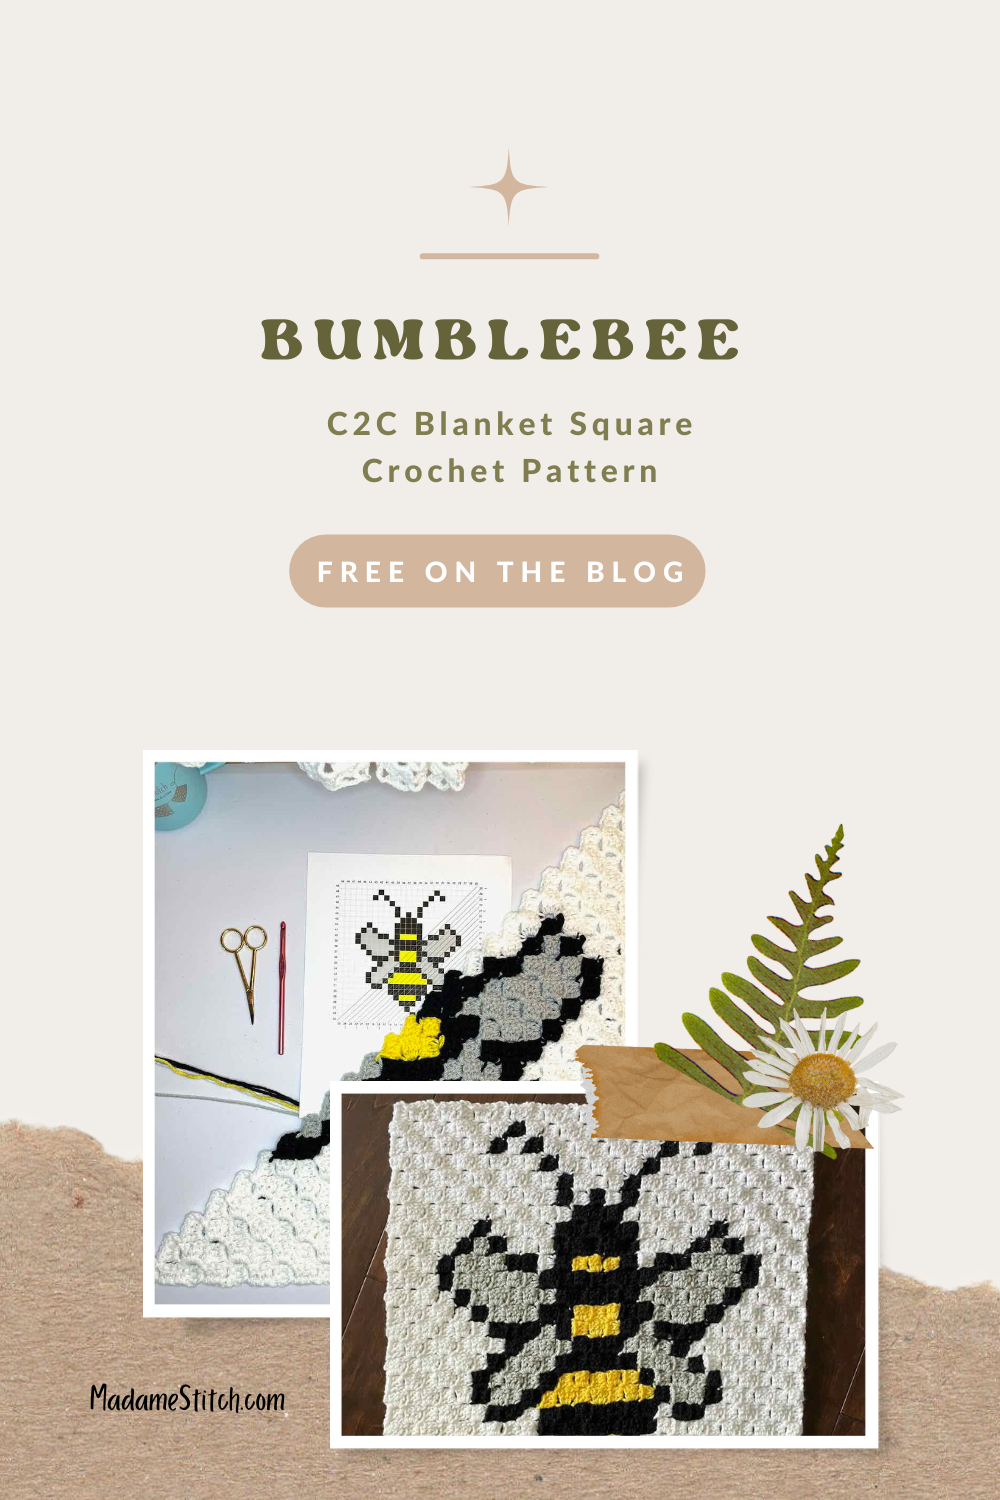
Written Instructions for the Bumble Bee C2C blanket square
Thank you for staying on this post and reading my patterns right here on the blog, without copy/pasting. When you stay here to follow the free version of my pattern, I am compensated for my time and energy. This is a great, free way to support a designer. If you would like to save this for later, bookmark the page to save it in your mobile browser.
Increase at both ends of the row.
← Row 1 (RS): (A) x 1 [1 square]
→ Row 2 (WS): (A) x 2 [2 squares]
← Row 3 (RS): (A) x 3 [3 squares]
→ Row 4 (WS): (A) x 4 [4 squares]
← Row 5 (RS): (A) x 5 [5 squares]
→ Row 6 (WS): (A) x 6 [6 squares]
← Row 7 (RS): (A) x 7 [7 squares]
→ Row 8 (WS): (A) x 8 [8 squares]
← Row 9 (RS): (A) x 9 [9 squares]
→ Row 10 (WS): (A) x 10 [10 squares]
← Row 11 (RS): (A) x 11 [11 squares]
→ Row 12 (WS): (A) x 12 [12 squares]
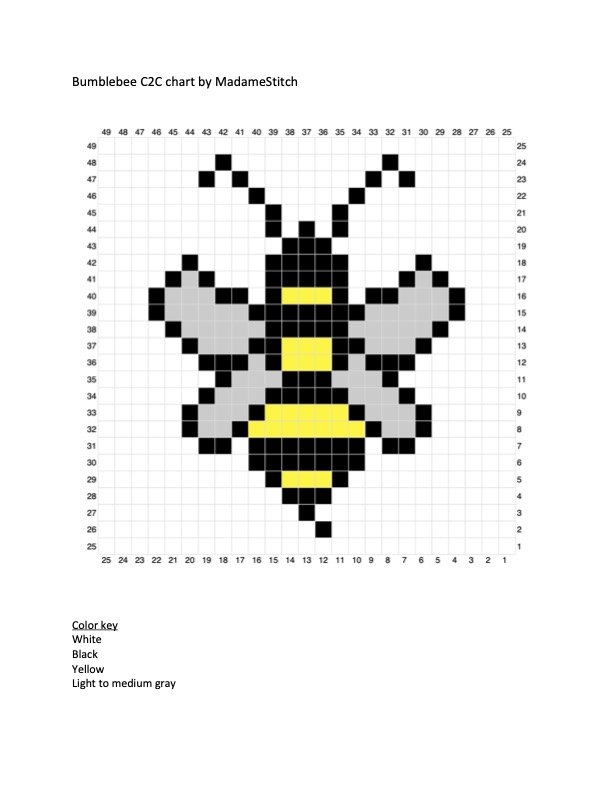
← Row 13 (RS): (A) x 5, (B) x 2, (A) x 4, (B) x 1, (A) x 1 [13 squares]
→ Row 14 (WS): (A) x 6, (B) x 1, (C) x 1, (B) x 1, (A) x 5 [14 squares]
← Row 15 (RS): (A) x 6, (C) x 2, (A) x 1, (B) x 4, (A) x 2 [15 squares]
→ Row 16 (WS): (A) x 3, (B) x 1, (D) x 1, (B) x 3, (C) x 1, (B) x 1, (A) x 6 [16 squares]
← Row 17 (RS): (A) x 7, (C) x 2, (D) x 1, (B) x 2, (D) x 1, (B) x 1, (A) x 3 [17 squares]
→ Row 18 (WS): (A) x 4, (D) x 1, (B) x 2, (D) x 1, (B) x 1, (C) x 1, (B) x 5, (A) x 3 [18 squares]
← Row 19 (RS): (A) x 3, (B) x 1, (C) x 3, (B) x 1, (C) x 2, (D) x 2, (B) x 3, (A) x 4 [19 squares]
→ Row 20 (WS): (A) x 5, (B) x 2, (D) x 2, (B) x 1, (C) x 1, (B) x 1, (C) x 4, (A) x 4 [20 squares]
← Row 21 (RS): (A) x 4, (B) x 1, (C) x 6, (B) x 1, (D) x 2, (B) x 2, (A) x 5 [21 squares]
→ Row 22 (WS): (A) x 6, (B) x 1, (D) x 2, (B) x 4, (C) x 4, (A) x 5 [22 squares]
← Row 23 (RS): (A) x 5, (B) x 3, (C) x 2, (B) x 1, (D) x 1, (B) x 2, (D) x 2, (A) x 7 [23 squares]
→ Row 24 (WS): (A) x 6, (B) x 5, (D) x 2, (B) x 3, (A) x 8 [24 squares] ← Row 25 (RS): (A) x 10, (B) x 2, (D) x 2, (C) x 4, (B) x 1, (A) x 6 [25 squares]
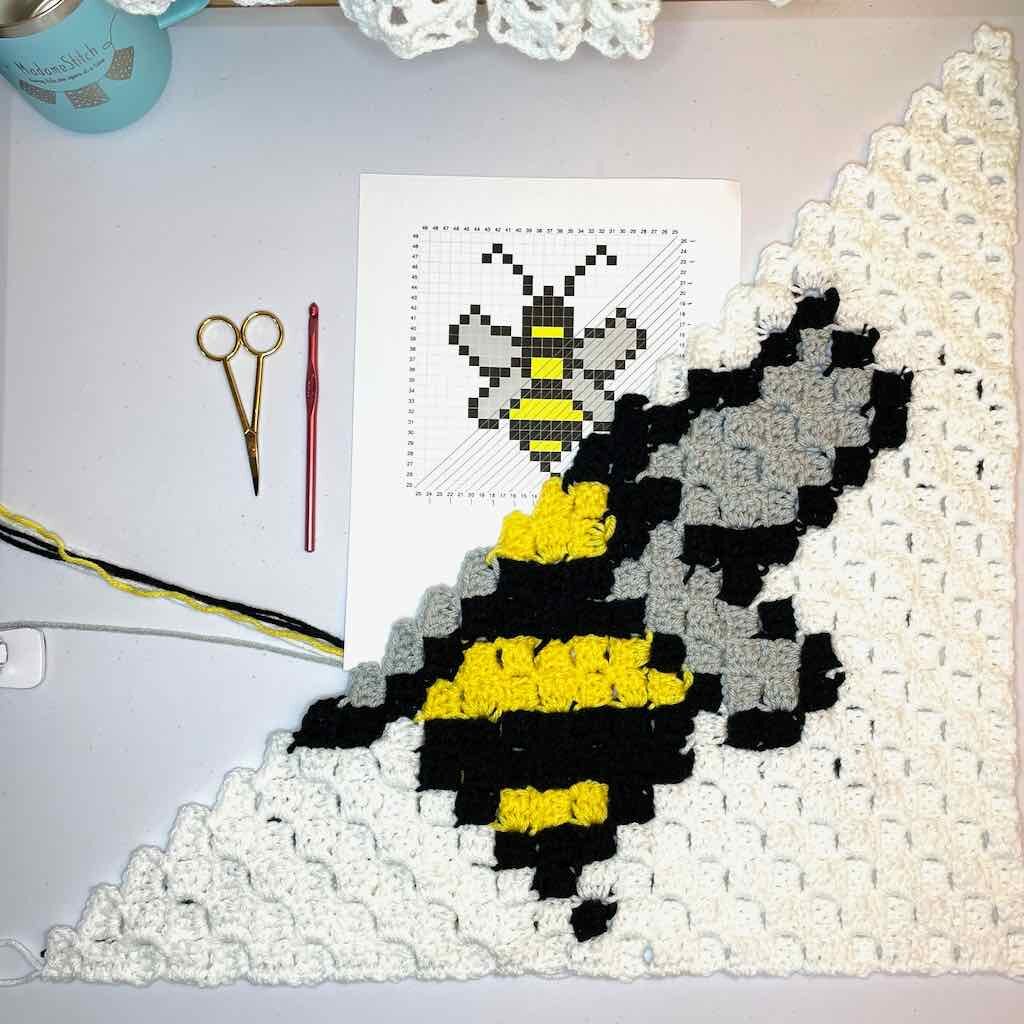
Decrease at both ends of the row.
→ Row 26 (WS): (A) x 6, (C) x 4, (B) x 1, (D) x 1, (B) x 3, (A) x 9 [24 squares]
← Row 27 (RS): (A) x 8, (B) x 1, (D) x 1, (B) x 3, (C) x 4, (B) x 1, (A) x 5 [23 squares]
→ Row 28 (WS): (A) x 5, (B) x 7, (D) x 1, (B) x 2, (A) x 7 [22 squares]
← Row 29 (RS): (A) x 2, (B) x 1, (A) x 4, (B) x 2, (D) x 1, (B) x 1, (C) x 2, (B) x 1, (A) x 7 [21
squares]
→ Row 30 (WS): (A) x 6, (B) x 1, (C) x 2, (B) x 6, (A) x 5 [20 squares]
← Row 31 (RS): (A) x 1, (B) x 4, (A) x 1, (B) x 3, (A) x 1, (C) x 3, (A) x 6 [19 squares]
→ Row 32 (WS): (A) x 5, (B) x 1, (C) x 2, (B) x 1, (A) x 1, (B) x 3, (A) x 5 [18 squares]
← Row 33 (RS): (A) x 9, (B) x 1, (C) x 2, (A) x 5 [17 squares]
→ Row 34 (WS): (A) x 4, (B) x 1, (C) x 2, (A) x 3, (B) x 1, (A) x 5 [16 squares]
← Row 35 (RS): (A) x 4, (B) x 1, (A) x 3, (B) x 1, (C) x 2, (A) x 4 [15 squares]
→ Row 36 (WS): (A) x 3, (B) x 1, (C) x 2, (A) x 8 [14 squares]
← Row 37 (RS): (A) x 3, (B) x 1, (A) x 3, (B) x 3, (A) x 3 [13 squares]
→ Row 38 (WS): (A) x 12 [12 squares]
← Row 39 (RS): (A) x 2, (B) x 1, (A) x 8 [11 squares]
→ Row 40 (WS): (A) x 10 [10 squares]
← Row 41 (RS): (A) x 1, (B) x 2, (A) x 6 [9 squares]
→ Row 42 (WS): (A) x 8 [8 squares]
← Row 43 (RS): (A) x 7 [7 squares]
→ Row 44 (WS): (A) x 6 [6 squares]
← Row 45 (RS): (A) x 5 [5 squares]
→ Row 46 (WS): (A) x 4 [4 squares]
← Row 47 (RS): (A) x 3 [3 squares]
→ Row 48 (WS): (A) x 2 [2 squares]
← Row 49 (RS): (A) x 1 [1 square]
Chart Instructions
- Begin with Row 1 (the first block) in the bottom right-hand corner.
- All odd-numbered rows are read from right to left.
- All even- numbered rows are read from left to right.
- Increase at both ends of the row through Row 25, then decrease at both ends of the row to the last block (Row 49).



Hi,
I think there is a discrepancy between the chart and the instructions for row 13. Looking at the chart I think it should be 5a 2b 4a 1b 1a. The insructions say 11a 1b 1a. If you follow the instuctions you don’t get a black border all the way around the bee. Please could you clarify. Thanks
April,
You are absolutely right – good catch.
I can’t tell you how many times the chart was checked against the written instructions and that wasn’t caught.
I’ll get that fixed…thanks!
-Debbie
Thank you Debbie,
Will you be updating the pdf? I downloaded mine as part of the Allotment Blanket CAL
Thanks
April
Yes, if you click on the graphic to download the PDF, I’ve loaded the updated/corrected PDF on the website. You can get it there.
-Debbie
How can I make this bigger? It’s very small. Not near blanket size.
Tami,
It’s not meant to be blanket size. The instructions are for a square and that square was included in a collaborative blanket CAL that’s detailed on the blog post.
You can make it bigger by continuing to increase until 2 of the sides are the size you want. Then begin to decrease.
Best,
Debbie