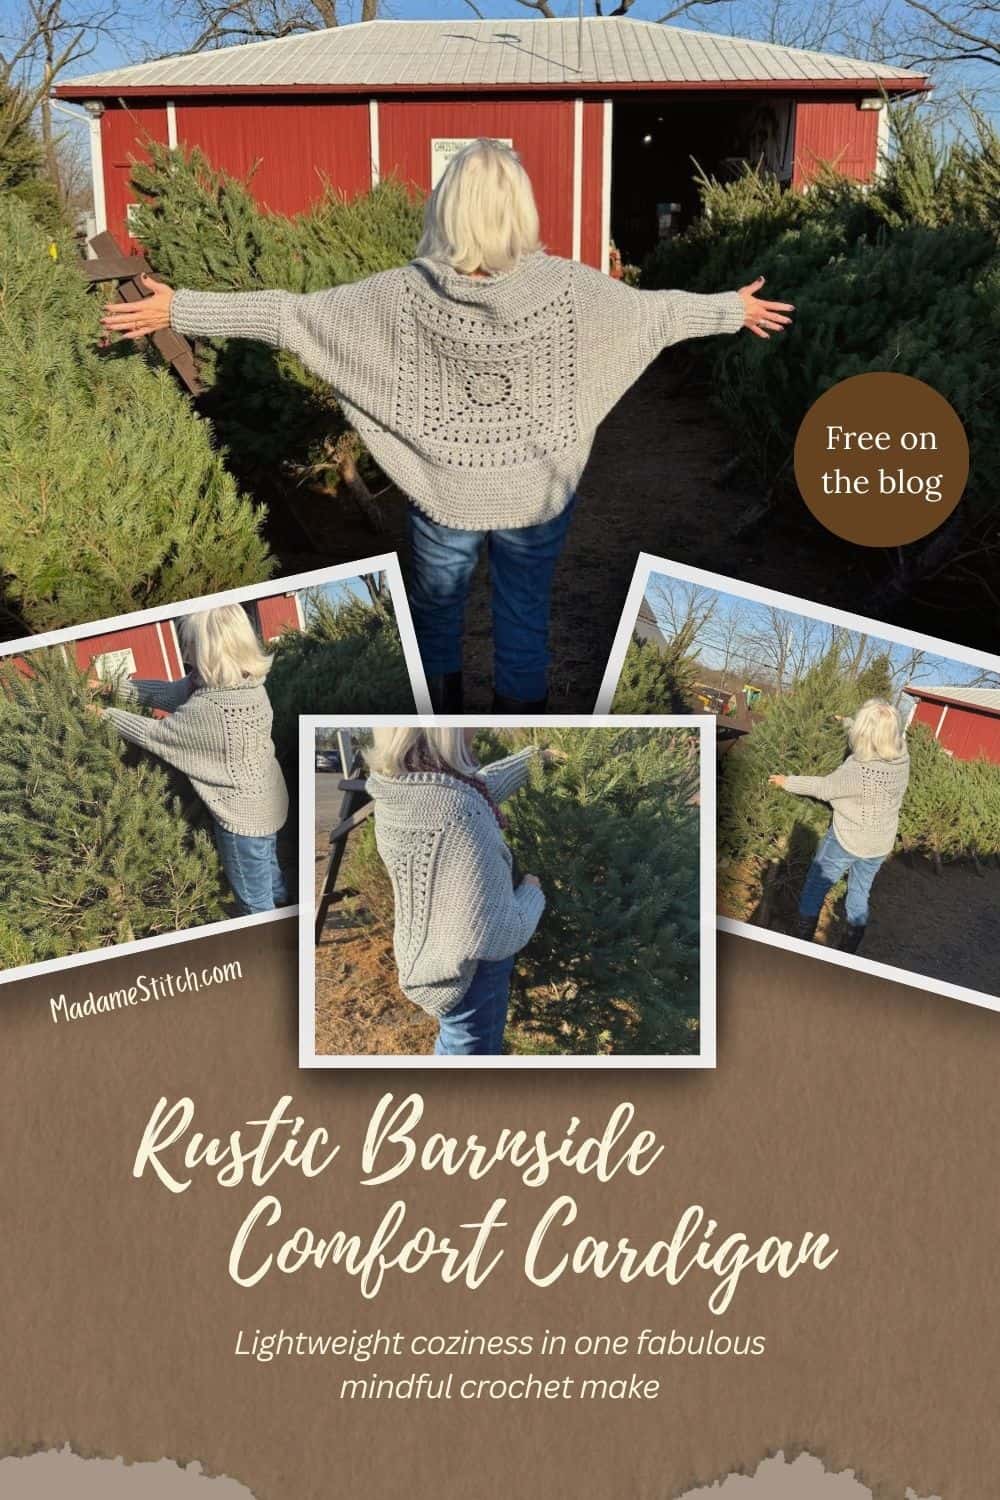
A cozy cocoon sweater becomes your perfect comfy winter cardigan
The Rustic Barnside Comfort Cardigan is more than just a crochet project—it’s an opportunity to create something that feels like a warm, comforting hug. With its loose, cocoon-like fit, this sweater is designed to wrap you in softness and keep you snug during the cold months.
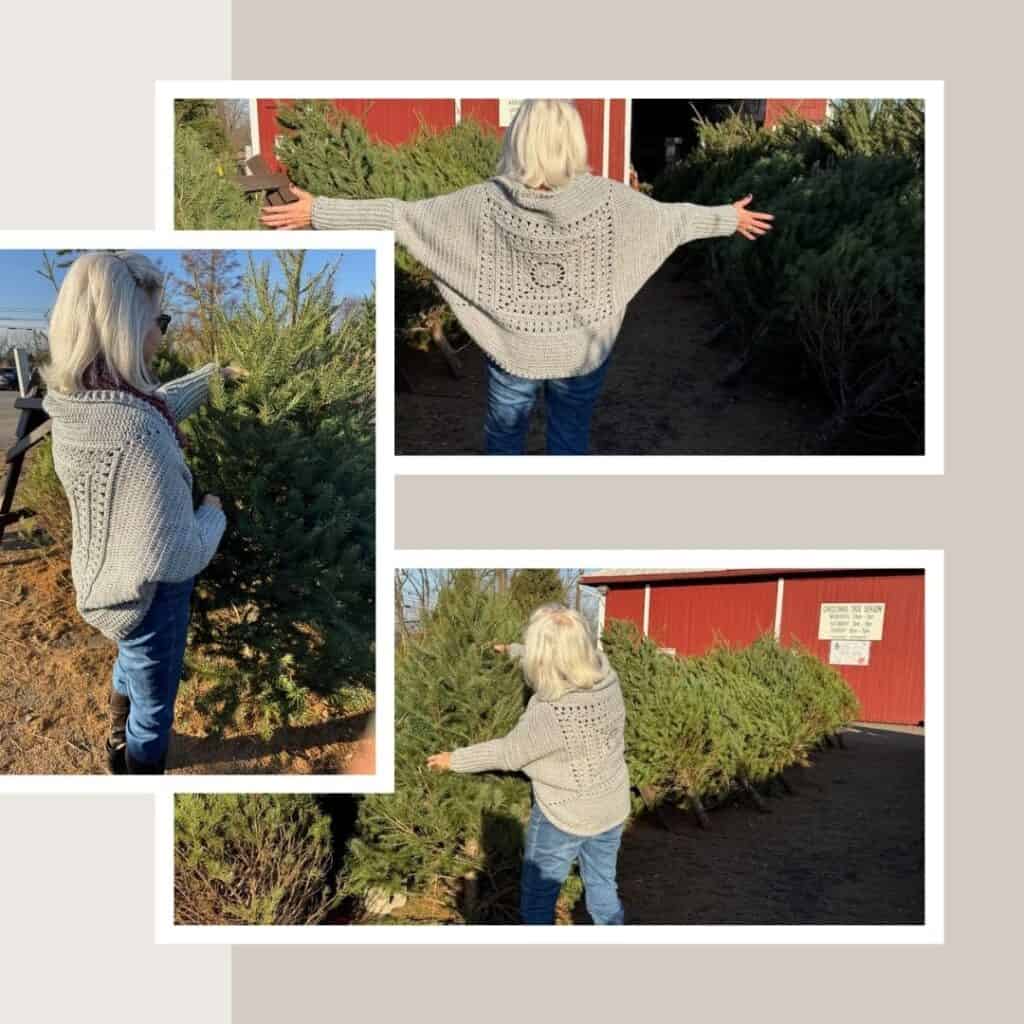
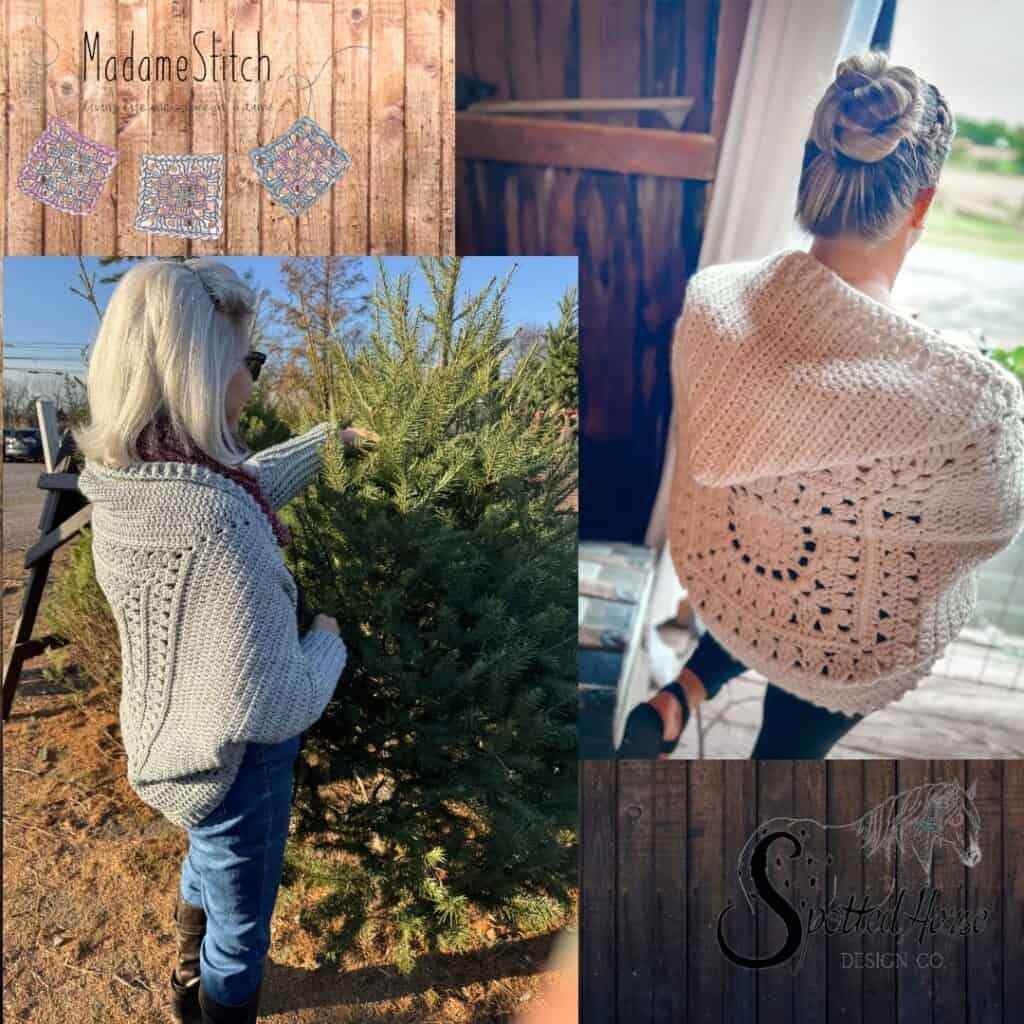
The Rustic Barnside Comfort Cardigan (cocoon sweater)
It all started last spring…
Christine of Spotted Horse Design Co and I officially met in person last year. We immediately hit it off. Before we knew it, we had tentatively planned to collaborate on a design that we would offer as a CAL.
The funny thing is that our design styles are vastly different. Christine loves the quick easy coziness of bulky weight yarn while I’m a fan of the lightweight elegance of worsted weight yarn. While I focus on simple, elegant accessories, she specializes in designs that reflect her off-grid lifestyle.
Well, it turns out the cocoon sweater is the perfect blend of simple, elegant, cozy…the list goes on. Its construction offers so much flexibility and gives us the chance to showcase both our design styles. So, that’s what we chose.
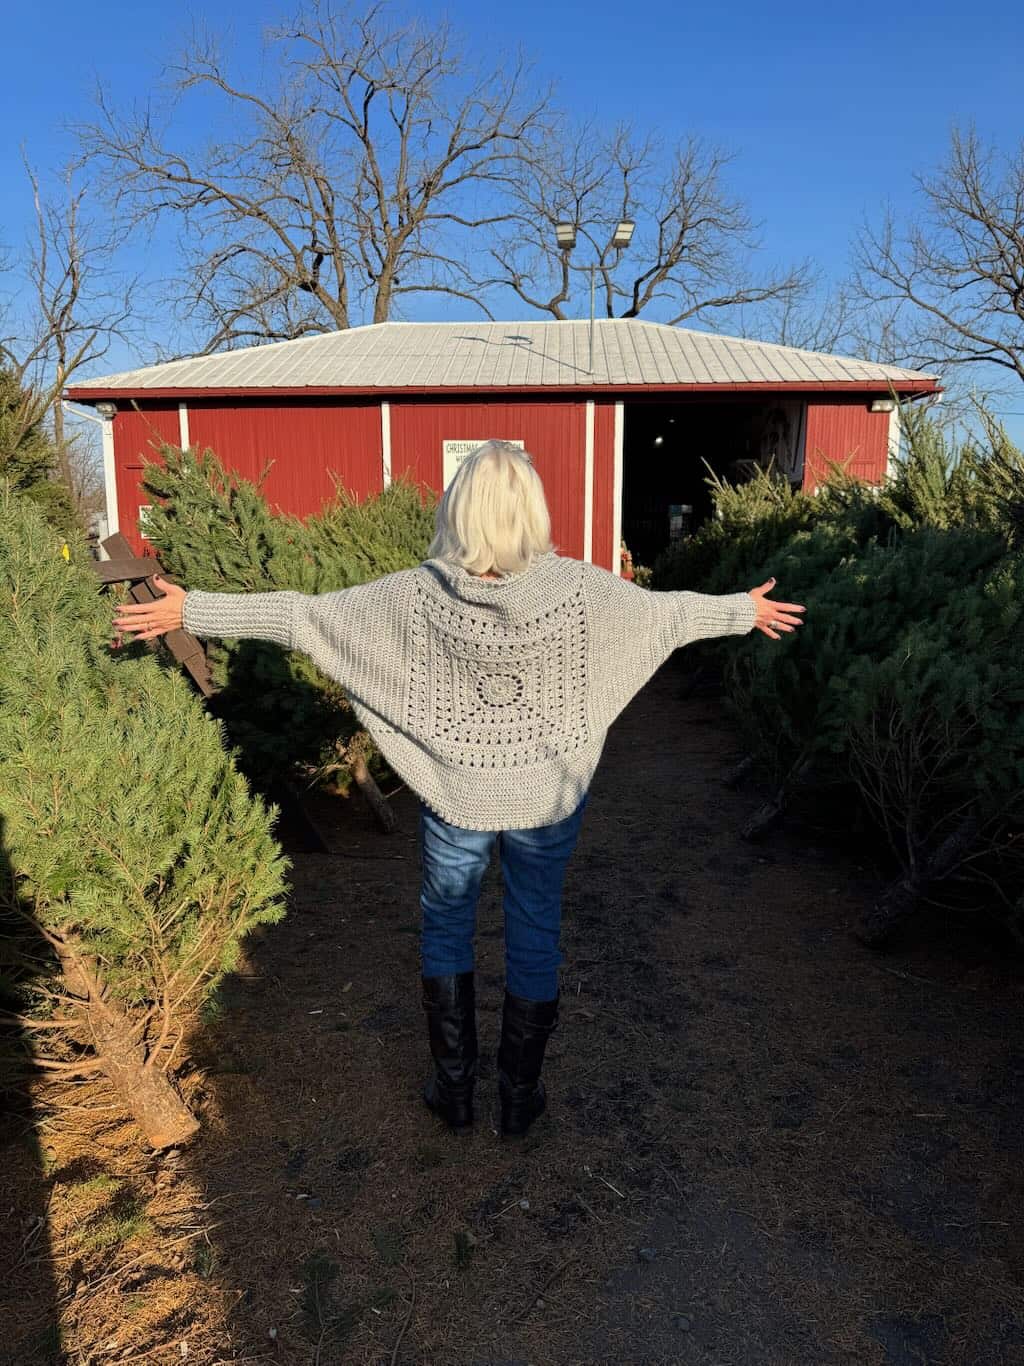
I love a cocoon sweater because its loose, relaxed fit feels like being wrapped in a cozy blanket—but without all the bulk. It’s the kind of garment that moves with you, offering comfort without sacrificing style.
Whether you’re curled up on the couch with a good book or heading out for a casual coffee date, a cocoon sweater provides just the right amount of warmth and ease. Its drape-y silhouette flatters a variety of body types, making it a versatile addition to any wardrobe. Best of all, it pairs effortlessly with leggings or jeans, creating a put-together look that still feels like loungewear.
Beyond its comfort and style, the cocoon sweater is a dream project for mindful makers. Its simple construction allows crocheters to relax and get lost in the rhythm of each stitch.
You don’t need to worry about complicated shaping or intricate techniques—just an enjoyable, meditative process that results in something beautiful and functional. Whether you’re crafting one for yourself or gifting it to a loved one, the cocoon sweater embodies warmth, comfort, and creativity.
I’m thrilled to present the Rustic Barnside Comfort Cardigan!
Design + Construction
Let me take you on a journey through this beautiful cocoon sweater.
You’ll start off with a gorgeous center square. Yep, I designed that…are you surprised?! I combined some of my favorite elements in the center square.
The center square of the cocoon sweater includes basic stitches from slip stitch to double crochet. You’ll find half double crochets worked in the 3rd loop, a simple technique that creates subtle surface texture without adding bulk. And, of course, my beloved granny stitch is right there.
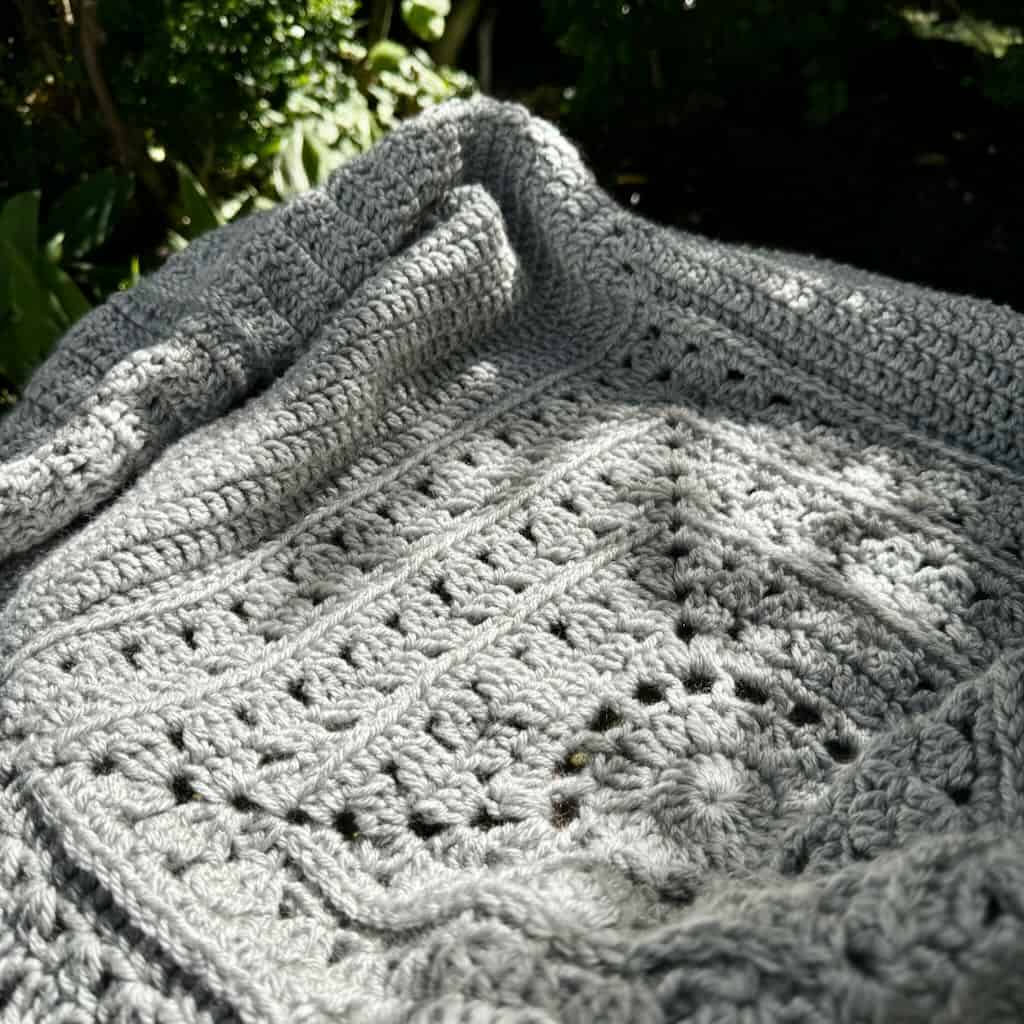
The length of your cocoon sweater is determined by the width of the center square. That center square is then extended on 2 sides to build the square out to a rectangle to create the side to side width of the cocoon sweater.
Front and back post stitches create a faux ribbing effect around the entire sweater for a decorative trim. That same ribbing is used in the sleeves to complete the look.
The entire cocoon sweater is worked in one piece, the only seaming needed being the underarm seams to form the armhole openings.
The Rustic Barnside Comfort Cardigan ticks all the boxes for what makers love to crochet.
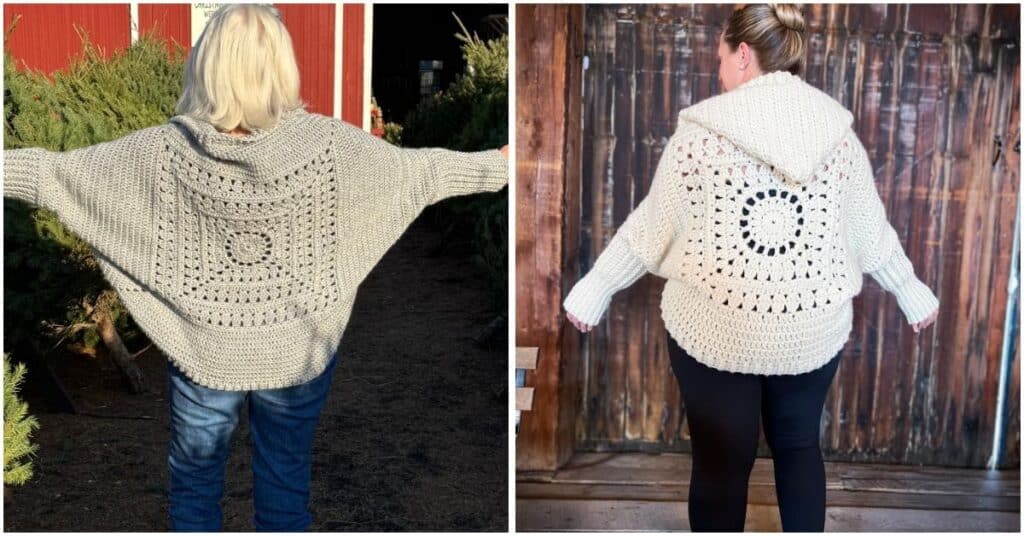
Interested in the Bulky Weight version?
Christine has designed the bulky weight version of this cocoon sweater, adapting the design to her bulky weight yarn.
If you’d love to make the Rustic Barnside Comfort Cardigan in bulky weight instead of the worsted weight offered here, head over to her CAL post to find out more about it.
Want to participate in the free crochet along?
Find all the details on my event post here.
Skill Level
I’ve listed the skill level of this cocoon sweater as Intermediate although I think an adventurous beginner with some experience under her belt will be just fine, especially with the video tutorials that accompany the written pattern.
While there are a number of components to the cocoon sweater, they all work beautifully and simply together for a mindful make that will become your favorite cozy comfort sweater!
The Yarn
When it comes to cozy comfort, I can’t think of a better yarn than Lion Brand’s “Heartland”. It’s a worsted weight yarn that’s perfect to create a sweater like the Rustic Barnside Comfort Cardigan that’s both beautiful and durable.
The 100% acrylic fiber means your cocoon sweater will be easy to care for. It’s both machine washable (be sure to place it in a laundry bag first) and dryable, although with any handmade item I recommend air drying to preserve the integrity of the stitches.
The heathered and tweedy shades are simply stunning, all inspired by the natural beauty of the American landscape. You’ll find richly saturated colors alongside gorgeous neutrals to suit any taste.
I chose a beautiful neutral (light gray) color; however, if you’re feeling bold and bright, I say go for it!
Any worsted weight yarn will work. To preserve the coziness of the cocoon sweater, however, you’ll want to choose a yarn that soft, pliable and easy on the skin.

Yarn Substitute
You may not want to use the Heartland that I used for my sweater (although I HIGHLY recommend it). I have a handy free download that will help you make the very best decision when substituting yarn for this cocoon sweater.

The Rustic Barnside Comfort Cardigan eBook
The eBook for the Rustic Barnside Comfort Cardigan includes everything you need – detailed instructions and more – to make both the worsted weight and bulky weight versions of this cocoon sweater.
The premium PDF for the worsted weight version is included in the full eBook and can only be obtained by purchasing the eBook.
Get your copy of the eBook now before the price increases.
Pricing structure:
Until Monday, January 13 – $10.99
Through Monday, February 10 – $12.99
Beginning Tuesday, February 11 – $15

The Rustic Barnside Comfort Cardigan free pattern starts here
Note: The free version of the Rustic Barnside Comfort Cardigan (worsted weight only) will be added to this post in sections as part of the free crochet along.
The release schedule is as follows:
- January 13th – Center Square
- January 20th – Side extensions/Seaming for the armhole
- January 27th – Sleeves
- January 31st – Hood (bulky version)
- February 3rd – Rib trim around the entire sweater
Once the trim portion has been released, the free pattern will be complete.
General Information
Yarn
Lion Brand “Heartland” 100% acrylic worsted weight 4 (5oz/251yd; 142g/230m): Color #150T – Mount Rainier
- Size S/M – 5 skeins
- Size X/XL – 6 skeins
- Size 2X/3X – 7 skeins
Hook
US size H-8 (5mm) or size needed for gauge
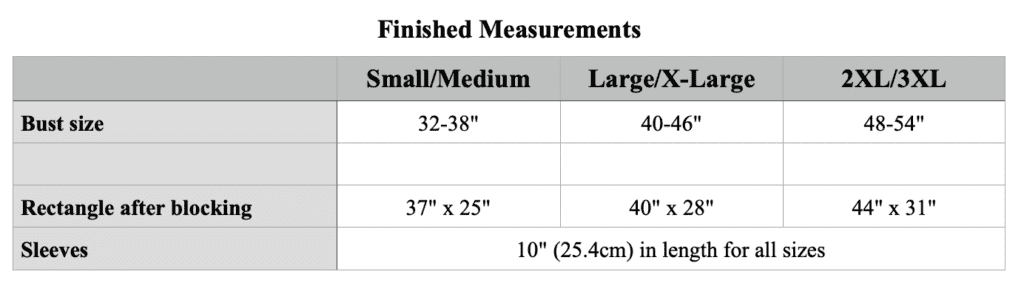
Finished Measurements/Sizes
Gauge
13.5 dc x 6.67 rows = 4” worked in dc (Gauge is not critical; however, not meeting gauge will alter the finished size of your cocoon sweater.)
Abbreviations – US crochet terminology
- beg – beginning
- ch – chain
- dc – double crochet
- hdc – half double crochet
- rep – repeat
- rnd(s) – round(s)
- sc – single crochet
- sk – skip
- sp – space
- st(s) – stitch(es)
- RS – right side
- WS – wrong side
- YO – yarn over
Repeats
- (…) – Work everything within the parentheses in the same st or sp.
- […] – Repeat everything within the brackets the indicated number of times.
- {…} – Repeat everything within the brackets the indicated number of times.
Stitch counts (and variations for sizes) are listed as follows:
- < S/M (L/XL, 2L/3L) > OR
- S/M (L/XL, 2L/3L)
Special Stitches
2 double crochet cluster (2dc cl) – YO, insert hook in indicated st, YO, pull up loop, YO, pull through 2 loops, YO, insert hook in same st, YO, pull up loop, YO, pull through 2 loops, YO, pull through 3 loops on hook.
Double crochet 2 together (dc2tog) – [YO, insert hook in next st, YO, pull up loop, YO, pull through 2 loops] twice, YO, pull through all loops on the hook. This dc2tog is worked with the beg ch-2 across the 3 dc of the 1st GS of Rnd 6.
Double crochet 3 together (dc3tog) – [YO, insert hook in next st, YO, pull up loop, YO, pull through 2 loops] 3 times, YO, pull through 4 loops. This dc3tog is worked over the 3 dc of the GS below. Note: The dc3tog worked in the corner spaces are the same as those worked over a GS. The difference is the hook is inserted in the corner sp instead of in a st.
Granny stitch (GS) – 3 dc in the same st or sp.
Half double crochet in the 3rd loop (hdc 3lp) – when working from the front side of the stitch below – YO, insert hook through the 3rd loop that sits behind and just under the top loop of the stitch, YO, pull through 3rd loop, YO, pull through all 3 loops on hook to complete the hdc.
Invisible join: At the end of the rnd, remove working loop from hook, insert hook from back to front through the top of the 1st st of the rnd, add working loop back onto hook and pull through to the wrong side of the square; continue as instructed.
Puff – YO, insert hook in indicated sp, YO, pull up loop, [YO, insert hook in same sp, YO, pull up loop] twice, YO, pull through 7 loops on hook.
Stacked single crochet (STsc) – (This stitch is used at the beginning of a row or round to replace the traditional turning ch-3. It has the appearance of a dc.) – Insert hook in the same st as the loop, YO, pull up a loop, YO, pull through 2 loops (bottom sc made), insert hook in the left vertical bar of the bottom sc, YO, pull up a loop, YO, pull through 2 loops (top sc made).
Pattern Instructions
Center Square – Section 1
Notes
- The worsted weight version is constructed in one color. The only time the yarn is cut and reattached for the Center Square is after Rnd 4 because Rnd 5 starts in a corner sp.
- Do not turn after any rnd. All rnds are worked with RS facing.
- A ch-1 at the beg of a rnd does not count as a st.
- A ch-3 may be substituted for the STsc without altering the construction of the square.
Ch 4, join with slip st to form a ring. OR, use a magic ring, tightening the ring at the end of Rnd 1.
Rnd 1: (STsc, 15 dc) in the ring, join with slip st to beg st. < 16 dc >
Rnd 2: (Ch 2, dc) in the same st (counts as 1st 2dc cl), ch 1, [2dc cl in the next st, ch 1] 15 times, join with slip st to beg dc. < 16 2dc cl, 16 ch-1 sp >
Rnd 3: Slip st into the ch-1 sp, STsc, ch 2, [dc in the next ch-1 sp, ch 2] 15 times, join with slip st to beg st. < 16 dc, 16 ch-2 sp >
Note for Rnd 4: This rnd creates a square shape around the circle.
Rnd 4: Ch 1, hdc in the same st, 3 hdc in the next ch-2 sp, sc in the next st, 3 sc in the next ch-2 sp, sc in the next st, 3 hdc in the next ch-2 sp, hdc in the next st, [(puff, ch 3, puff) in the next ch-2 sp, hdc in the next st, 3 hdc in the next ch-2 sp, sc in the next st, 3 sc in the next ch-2 sp, sc in the next st, 3 hdc in the next ch-2 sp, hdc in the next st] 3 times, (puff, ch 3, puff) in the next ch-2 sp, join with slip st to beg st. Fasten off. < 8 puffs, 20 sc, 32 hdc, 4 ch-3 corner sp >
Note for Rnd 5: Count the hidden st after each corner when skipping 3 sts.
Rnd 5: Attach yarn to any ch-3 corner sp, (STsc, 2 dc, ch 3, GS) in the same corner sp, sk 3 sts, [GS in the next st, sk 2 sts] 4 times, {(GS, ch 3, GS) in the ch-3 corner sp, sk 3 sts, [GS in the next st, sk 2 sts] 4 times} 3 times, join with slip st to beg st. < 24 GS, 4 ch-3 corner sp >
Rnd 6: (Ch 2, dc2tog) across the GS (counts as 1st dc3tog), ch 2, (dc3tog, ch 3, dc3tog) in the ch-3 corner sp, {ch 2, [dc3tog across the next GS, ch 2] 6 times, (dc3tog, ch 3, dc3tog) in the ch-3 corner sp} 3 times, ch 2, [dc3tog across the next GS, ch 2] 5 times, join with slip st to beg dc2tog. < 32 dc3tog, 28 ch-2 sp, 4 ch-3 corner sp >
Rnd 7: Ch 1, hdc in the same st, 2 hdc in the ch-2 sp, hdc in the top of the last dc3tog before the corner sp, (2 hdc, ch 2, 2 hdc) in the ch-3 corner sp, {[hdc in the top of the next dc3tog, 2 hdc in the next ch-2 sp] 7 times, hdc in the last dc3tog before the corner sp, (2 hdc, ch 2, 2 hdc) in the ch-3 corner sp} 3 times, [hdc in the top of the next dc3tog, 2 hdc in the next ch -2 sp] 6 times, invisible join. < 26 hdc across each side, 4 ch-2 corner sp >
Note for Rnd 8: Be sure to work a hdc 3lp in the hidden st after each corner that may be covered by the corner sts from Rnd 7.
Rnd 8: Ch 1, hdc 3lp in the same st and in each st across to the ch-2 corner sp, [(2 hdc, ch 2, 2 hdc) in the ch-2 corner sp, hdc 3lp in the next st and in each st across to the next ch-2 corner sp] 3 times, (2 hdc, ch 2, 2 hdc) in the ch-2 corner sp, hdc 3lp in the next st and in each st across to the beg st, join with slip st to beg st. < 26 hdc 3lp across each side, 16 hdc, 4 ch-2 corner sp >
Note for Rnd 9: Count the hidden st as one of the skipped sts after each corner.
Rnd 9: (STsc, 2 dc) in the same st (counts as GS), sk 3 sts, GS in the next st, sk 3 sts, (GS, ch 3, GS) in the ch-2 corner sp, {[sk 3 sts, GS in the next st] twice, [sk 2 sts, GS in the next st] 5 times, sk 3 sts, GS in the next st, sk 3 sts, (GS, ch 3, GS) in the ch-2 corner sp} 3 times, sk 3 sts, GS in the next st, sk 3 sts, [GS in the next st, sk 2 sts] 5 times, join with slip st to beg st. < 40 GS, 4 ch-3 corner sp >
Rnd 10: (Ch 2, dc2tog) across the GS (counts as 1st dc3tog), ch 2, [dc3tog across the next GS, ch 2] across to the ch-3 corner sp, (dc3tog, ch 3, dc3tog) in the ch-3 corner sp, {ch 2, [dc3tog across the next GS, ch 2] across to the next ch-3 corner sp, (dc3tog, ch 3, dc3tog) in the ch-3 corner sp} 3 times, ch 2, [dc3tog across the next GS, ch 2] across to the beg dc2tog, join with slip st to beg dc2tog. < 48 dc3tog, 44 ch-2 sp, 4 ch-3 corner sp >
Rnd 11: Ch 1, hdc in the same st, [2 hdc in the ch-2 sp, hdc in the top of the next dc3tog] across to the ch-3 corner sp, (2 hdc, ch 2, 2 hdc) in the ch-3 corner sp, {hdc in the top of the dc3tog, [2 hdc in the ch-2 sp, hdc in the top of the next dc3tog] across to the ch-3 corner sp, (2 hdc, ch 2, 2 hdc) in the ch-3 corner sp} 3 times, hdc in the top of the dc3tog, 2 hdc in the ch-2 sp, [hdc in the top of the next dc3tog, 2 hdc in the ch-2 sp] across to the beg st, invisible join. < 38 hdc across each side, 4 ch-2 corner sp >
Note for Rnd 12: Be sure to work a hdc 3lp in the hidden st after each corner that may be covered by the corner sts from Rnd 11.
Rnd 12: Ch 1, hdc 3lp in the same st and in each st to the ch-2 corner sp, (2 hdc, ch 2, 2 hdc) in the ch-2 corner sp, [hdc 3lp in the next st and in each st across to the next ch-2 corner sp, (2 hdc, ch 2, 2 hdc) in the ch-2 corner sp] 3 times, hdc 3lp in the next st and in each st across to the beg st, join with slip st to beg st.. < 38 hdc 3lp across each side, 16 hdc, 4 ch-2 corner sp >
Note for Rnd 13: Count the hidden st as one of the skipped sts after each corner.
Rnd 13: Slip st in the next 2 sts, (STsc, 2 dc) in the same st, sk 2 sts, [GS in the next st, sk 2 sts] across to the next ch-2 corner sp, (GS, ch 3, GS) in the ch-2 corner sp, {sk 3 sts, [GS in the next st, sk 2 sts] across to the next ch-2 corner sp, (GS, ch 3, GS) in the ch-2 corner sp} 3 times, sk 3 sts, [GS in the next st, sk 2 sts] across to the beg st, join with slip st to beg st. < 60 GS, 4 ch-3 corner sp >
Rnd 14: Rep Rnd 10. < 68 dc3tog, 64 ch-2 sp, 4 ch-3 corner sp >
Rnd 15: Rep Rnd 11. < 53 hdc across each side, 4 ch-2 corner sp >
Rnd 16: Rep Rnd 12. < 53 hdc 3lp across each side, 16 hdc, 4 ch-2 corner sp >
Rnd 17: STsc, dc in the next st and in each st across to the ch-2 corner sp, (2 dc, ch 2, 2 dc) in the ch-2 corner sp, [dc in the next st and in each st across to the next ch-2 corner sp, (2 dc, ch 2, 2 dc) in the ch-2 corner sp] 3 times, dc in the next st and in each st across to the beg st, join with slip st to beg st. < 61 dc across each side, 4 ch-2 corner sp >
Rnds 18-22 (25, 28): Rep Rnd 17 5, (8, 11) times. < 81 (93, 105) dc across each side, 4 ch-2 corner sp >
Fasten off and weave in ends.
Video Tutorials for the Center Square
Side Extensions – Section 2
Notes
- The side extensions are worked on opposite sides of the Center Square. By doing so, the square becomes a rectangle.
- Be sure to work the same number of rows on both sides of the square.
- Turn after each rnd.
- A ch-2 or ch-3 may be substituted for the STsc without adversely affecting the construction of the side extensions. If you do substitute a turning ch for the STsc, be sure to work a stitch into it at the end of each row to maintain the proper st count.
Side 1
Row 1 (RS): With RS of the Center Square facing, attach yarn to any ch-2 corner sp, ch 1, STsc in the same sp, dc in the next st and in each st across to the opposite ch-2 corner sp, dc in the ch-2 corner sp, turn. < 83 (95, 107) dc >
Row 2 (WS): STsc, dc in the next st and in each st across, turn.
Rows 3-10 (10, 11): Rep Row 2 8 (8, 9) times.
Fasten off.
Rep for Side 2 (Reminder, attach yarn to the opposite side of the square.)
Once the Side 2 extension is complete, block the rectangle to the following dimensions: 37” x 25” (40” x 28”, 44” x 31”)
Side Seams (Forming the Armholes) – Section 2
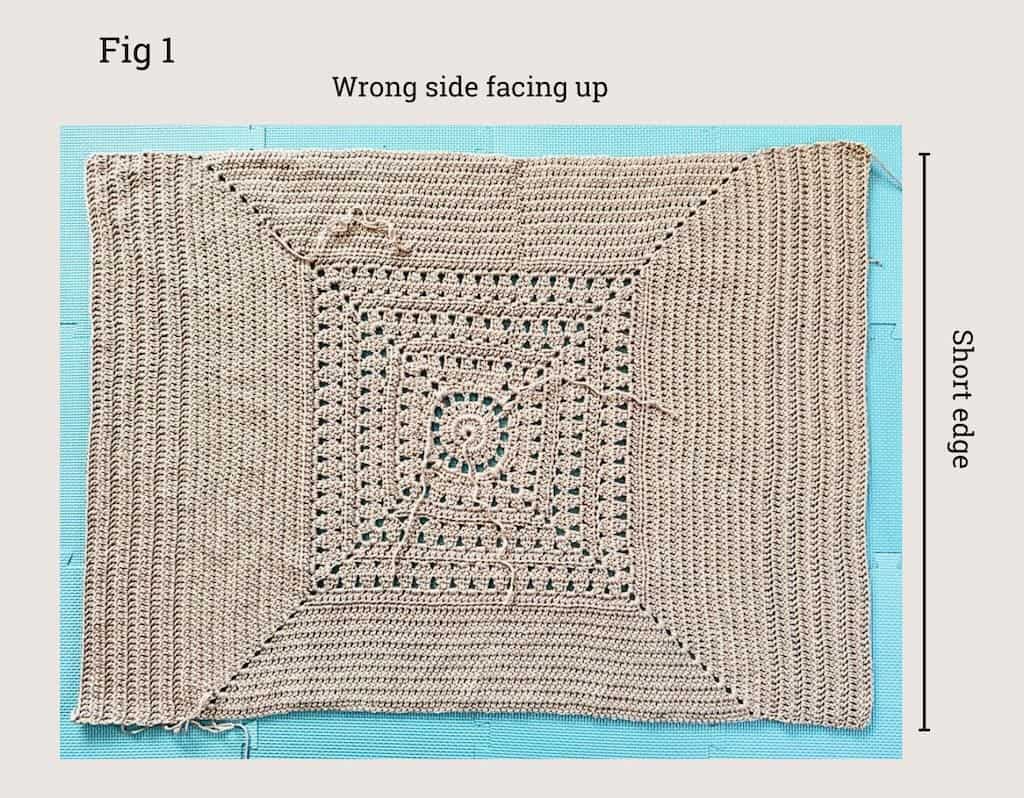
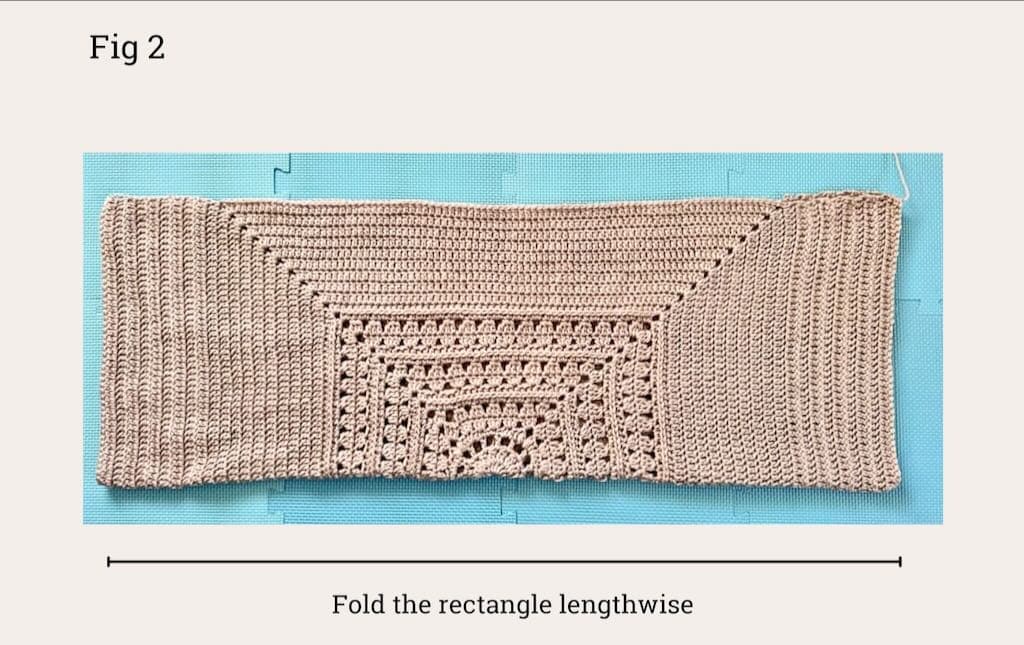
- Lay the rectangle flat with the short edges to the left and right. The wrong side should be facing up. (Fig 1)
- With wrong sides held together, fold the rectangle in half lengthwise. (Fig 2)
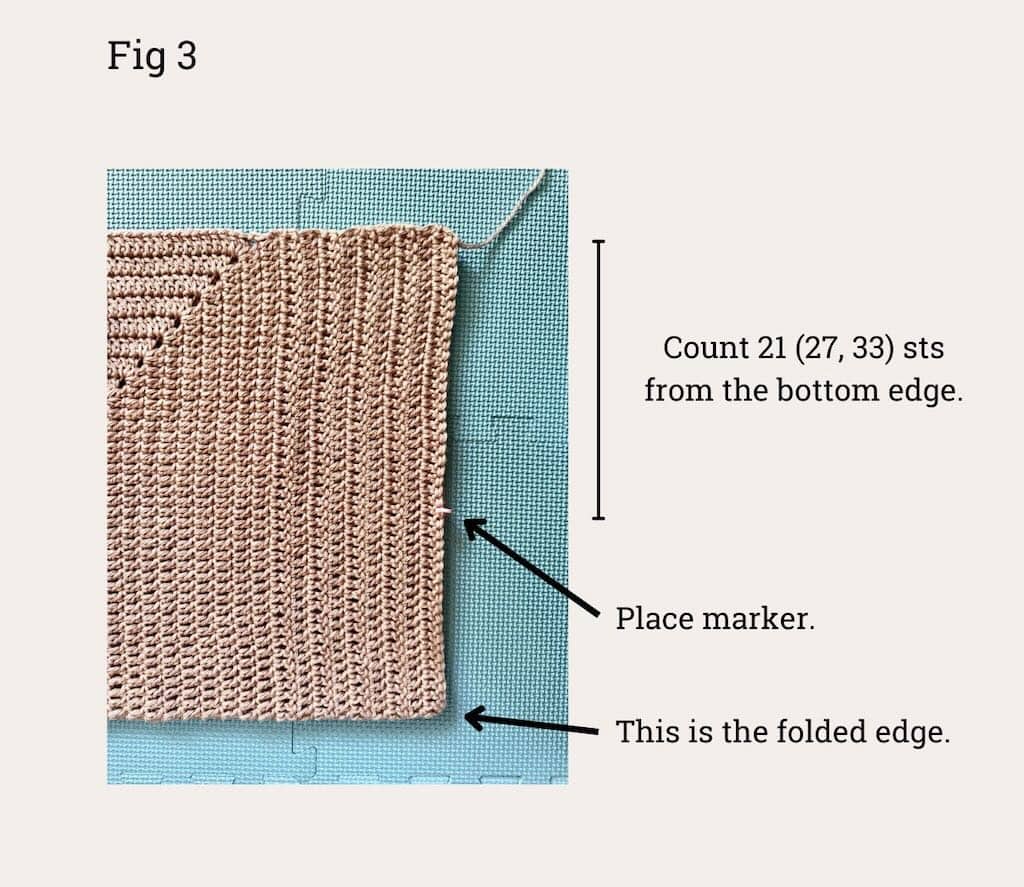
- Count 21 (27, 33) sts (on each side of the seam) from the bottom edge toward the fold. Place a stitch marker through the 21st (27th, 33rd) st to mark the armhole edge of the seam. Note: There should be 41 sts around the armhole opening for all sizes. (Fig 3)
- To form the side seam, align the corner stitches of each short side and attach yarn through both inner loops only (not through both top loops). Using a slip stitch seam, work from the corner sts to the marker, working the last st in the marked sts. Note: A whipstitch seam will also work.
- Fasten off.
- Repeat for the 2nd seam.
Video Tutorials for the Side Extensions/Seaming
Sleeves – Section 3
Notes
- Do not turn after any rnd in the sleeve.
- A ch-1 at the beg of a rnd does not count as a st.
- The instructions are the same for all sizes
Sleeve 1
With the RS of the sweater facing, attach the yarn to the armhole seam.
Rnd 1 (RS): STsc in the armhole seam, dc in the next st and in each st around the armhole, join with slip st to beg st. < 42 dc >
Rnd 2: Ch 1, sk the st at the base of the ch-1, dc2tog over the next 2 sts, FPdc around the st under the 2nd leg of the dc2tog, BPdc around the next st, [FPdc around the next st, BPdc around the next st] around, join with slip st to beg dc2tog. < 41 sts >
Rnd 3: Ch 1, sk the st at the base of the ch-1, dc2tog over the next 2 sts, BPdc around the st under the 2nd leg of the dc2tog, [FPdc around the next st, BPdc around the next st] around, join with slip st to beg dc2tog. < 40 sts >
Rnd 4: Rep Rnd 2. < 39 sts >
Rnd 5: Rep Rnd 3. < 38 sts >
Rnd 6: Rep Rnd 2. < 37 sts >
Rnd 7: Rep Rnd 3. < 36 sts >
Rnds 8-24: Ch 1, FPdc around the same st, BPdc around the next st, [FPdc around the next st, BPdc around the next st] around, join with slip st to beg FPdc. < 36 sts >
Fasten off.
Rep for Sleeve 2.
Weave in all ends.
Video Tutorial for the Sleeves
Sweater Trim – Section 4
Note:
- Do not turn after any rnd of the trim.
- While the number of stitches in Rnd 1 isn’t critical, it must be an even number for Rnd 2 to work out correctly.
With the RS of the sweater facing, attach the yarn halfway between the 2 seams (this will become the center back of the neck).
Rnd 1: STsc, dc in the next st and in each st across to the corner sp, 1 dc in the corner sp, 2 dc in the end of each of the next 20 (20, 22) rows of the side extensions, 1 dc in the corner sp, dc in the next st and in each st across to the next corner sp, 1 dc in the corner sp, 2 dc in the end of each of the next 20 (20, 22) rows of the side extensions, 1 dc in the corner sp, dc in the next st and in each st across to the beg st, join with slip st to beg st. < 246 (270, 302) dc >
Rnd 2: Ch 1, FPdc around the same st, BPdc around the next st, [FPdc around the next st, BPdc around the next st] around, join with slip st to beg st. < 123 (135, 151) FPdc, 123 (135, 151) BPdc >
Rnd 3: Rep Rnd 2.
Fasten off and weave in all ends.


Hi Debbie,
Do you need to purchase the E-book in order to make the hood? Not seeing it on your or Christine’s site unless I’m missing something.
If so, how long will you have the ordering information available for the book?
Thanks so much,
Sharon,
You don’t need to purchase the eBook to get the hood instructions. They are available on Christine’s blog post and work equally well for the worsted weight version.
By the way, the eBook will always be available for purchase. It won’t go away when the CAL is over. Get it anytime!
Best,
Debbie