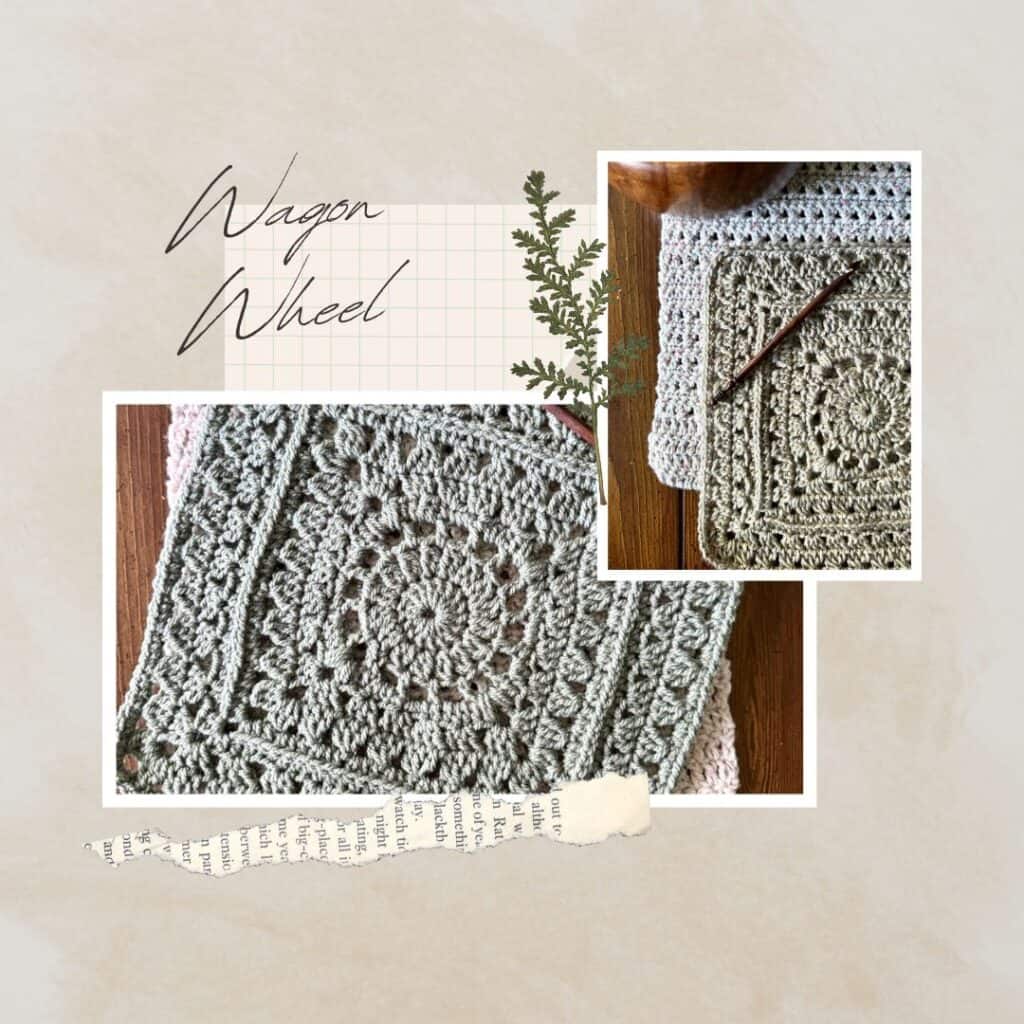
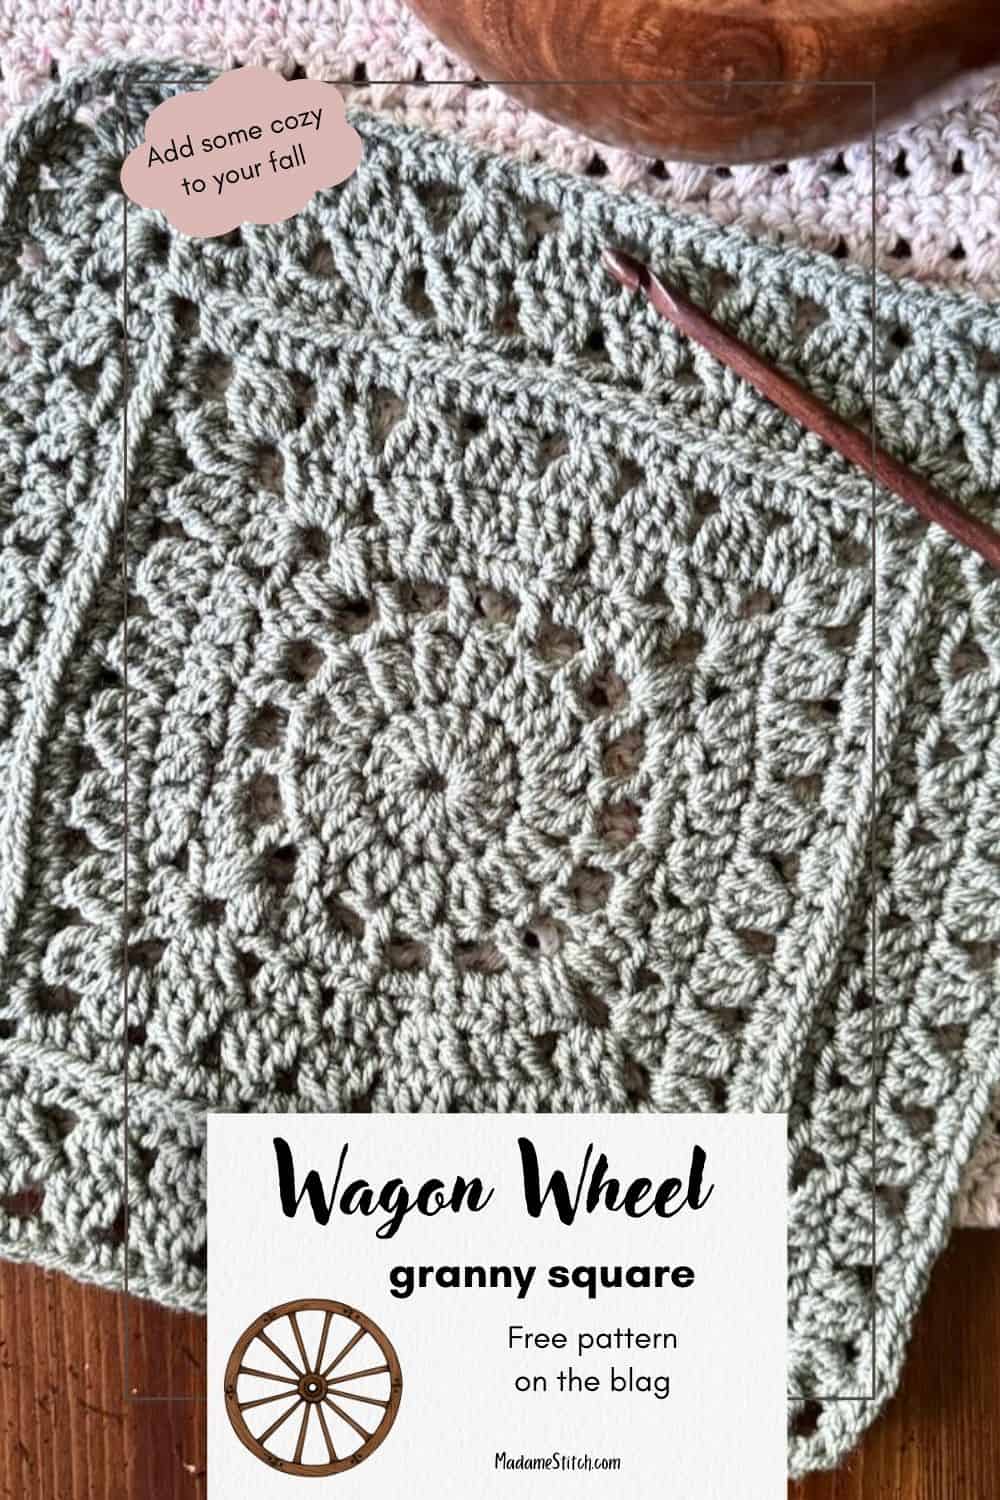
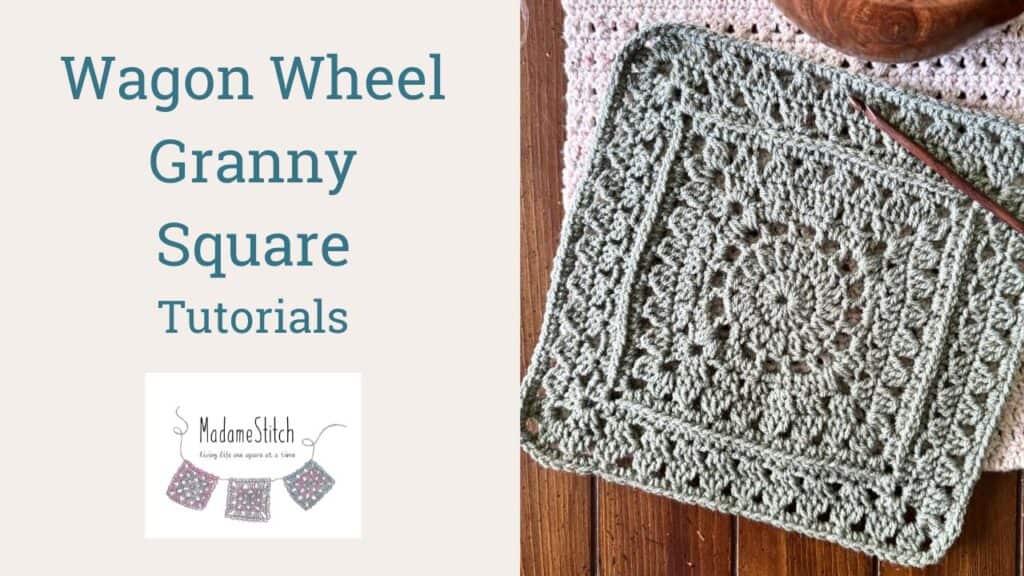
A granny square that makes you long for apple-picking and hayrides
The Wagon Wheel Granny Square evokes images of apple-picking and hayrides. It’s perfect for cozy home décor and warm scarves for your fall outings.
The Wagon Wheel Granny Square
Introducing the Wagon Wheel Granny Square – a crochet design that evokes the warmth and nostalgia of fall. With its circular, wagon wheel-inspired pattern, this granny square brings to mind cozy moments spent apple-picking, hayrides through golden fields, and the crisp, refreshing air of the season.
Whether you’re crafting a blanket, pillow, or a rustic throw, this granny square will add a touch of autumn charm to any project. Perfect for those who love the comfort and coziness that fall brings, the Wagon Wheel Granny Square is a beautiful way to weave the spirit of the season into your home.
Design + Construction
I’m in love with granny squares, have I told you that?!
Because I love them so much, I try to find ways to give variety to the traditional basic granny square for a bit of flair. Sometimes you just need a little variety!
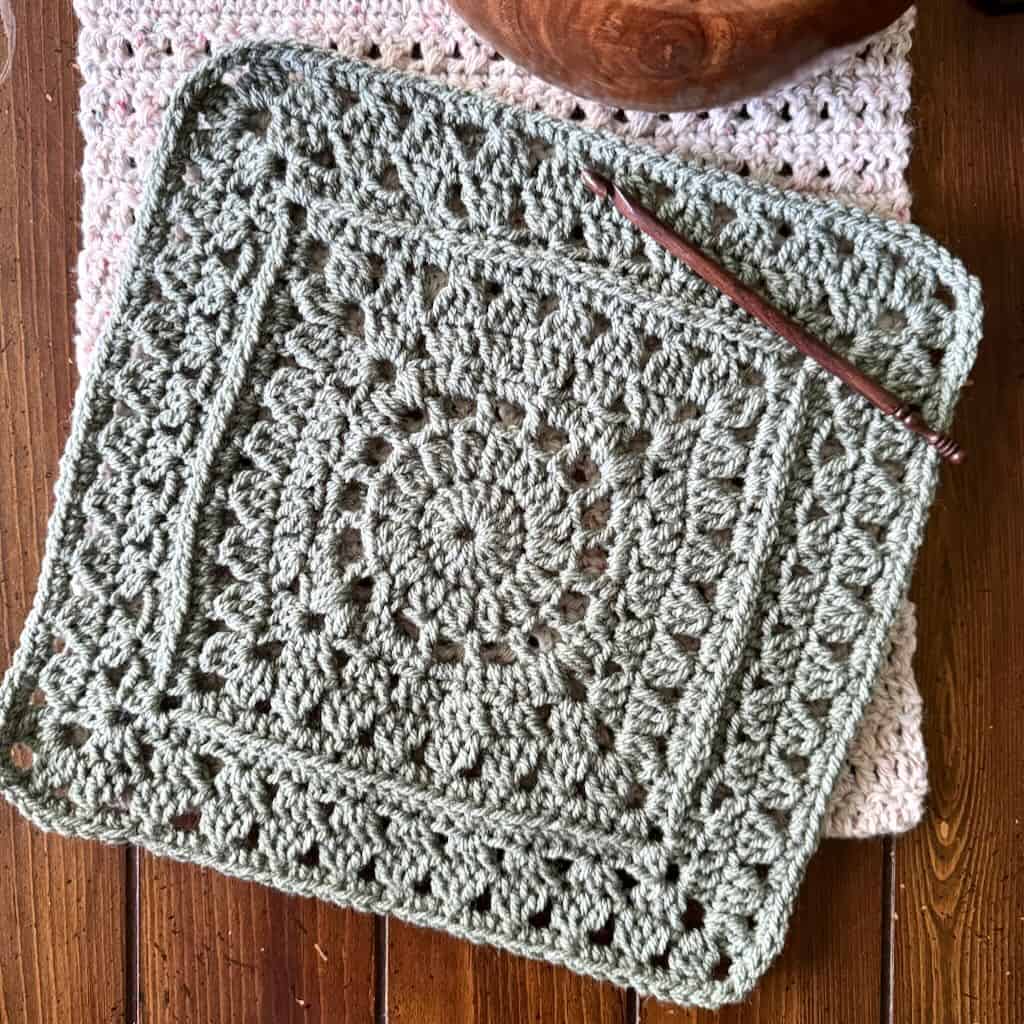
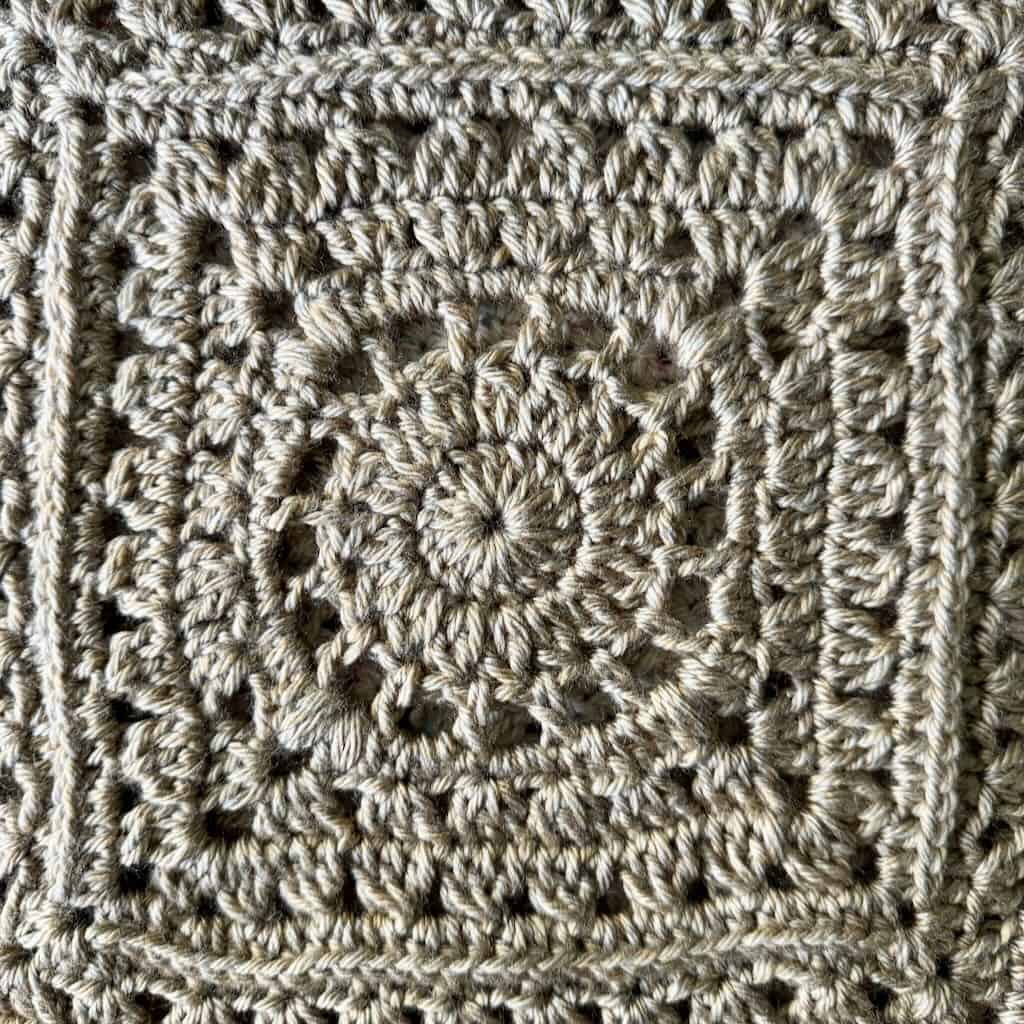
This 12″ granny square starts with a circular center. I didn’t start out with the intention of naming this granny square the Wagon Wheel. But, now that we’re in the fall season, I was inspired to tie the look of the granny square with all the feels of fall.
The Wagon Wheel granny square combines some of my favorite stitches into one crochet work. Of course, I’ve included the requisite granny stitch – 3 double crochet worked into the same stitch or space.
I’ve also included the modern granny stitch, a 2-round stitch pattern that takes the granny stitch and inverts it. The modern granny stitch is one of my favorite variations. I’ve even used it in my Floryn Baby Blanket.
One of my all-time favorite design elements, which you’ll see in a number of my recent designs, is the camel stitch, or the half double crochet worked in the third loop. This simple stitch gives the illusion of surface stitching that adds subtle texture to the square.

The Yarn
This post contains affiliate links. That means, if you purchase something using the link, I receive a small commission. You don’t pay any extra and your information is safe. Thanks for supporting my small business.
Any worsted weight yarn will work for this granny square. To get the same look as mine, choose an acrylic or acrylic blend. A cotton yarn will be a bit stiff but that’s my opinion! Choose something that’s right in the middle of the worsted weight range to get a square that isn’t flimsy (with a light worsted) or too bulky (with a worsted on the heavy end of the spectrum).
The yarn I used for the sample is Paintbox Yarns “Simply Aran” 100% acrylic worsted weight (3.5oz/201yd; 100g/184m) in Pine Green.
Looking for a Yarn Substitute?
Here are some of my favorites to use instead of the Simply Aran:
- Lion Brand “Basic Stitch”
- Lion Brand “Pound of Love”
- Lion Brand “Mandala Ombre”
- WeCrochet “Brava Worsted”
Where to get the PDF for the Wagon Wheel Granny Square
The pattern for the Wagon Wheel granny square is free here in this blog post. Scroll down to view the free version.
If you’d like a printer friendly and downloadable version of the PDF, I recommend purchasing it in my Ravelry shop.
The premium PDF can be uploaded to your favorite mobile device so you can take your Wagon Wheel granny square project with you to work on whenever you’re out and about.
The PDF is easy to read and beautifully formatted without ads for a great experience.
Get your copy today!

The 2024 Granny Stitch Sampler Blanket
The Wagon Wheel Granny Square is the 1st square to be released in the 2024 Granny Stitch Sampler Blanket crochet along. It’s feature day is Monday, September 30.
On that day, not only will the pattern be free here on the blog, you’ll be able to purchase the PDF for the Wagon Wheel Granny Square in my Ravelry shop at a 50% discount.

This unique, one-of-a-kind cozy blanket takes the granny stitch and turns it into a masterpiece.
12 crochet designers took the challenge to combine the traditional granny stitch with some of their favorite stitches and techniques. The result is truly extraordinary.
If you’d like to participate in the free crochet along, click the button below to find out more information.

The entire blanket pattern is available as a premium PDF. Through the month of October, you can purchase a copy for the discounted price of $12.99.
Now is the time to get your copy. The price will increase on Nov. 1.

The Free Pattern Starts Here
Materials + Tools
Yarn
Paintbox Yarns “Simply Aran” 100% acrylic worsted weight (3.5oz/201yd; 100g/184m)
Pine Green (67) – You’ll need approx. 135 yds or 2.3 oz
Any worsted weight yarn will work. However, substitute a similar fiber content to ensure your square is the right size.
Hook
US size H-8 (5mm) or size needed to meet gauge
Tools
- Blocking board and pins
- Tapestry needle for weaving in ends
General Information
Finished Size
Approx. 12″ square (blocked)
Gauge
Rnds 1-2 (measured across) = 3″
Skill Level
Advanced beginner/Intermediate: This granny square includes a variety of stitches and techniques beyond the basics.
Abbreviations – US crochet terminology
- beg – beginning
- ch – chain
- dc – double crochet
- hdc – half double crochet
- rep – repeat
- rnd(s) – round(s)
- sc – single crochet
- sk – skip
- sp – space
- st(s) – stitch(es)
- YO – yarn over
Repeats
- (…) – Work everything within the parentheses in the same st or sp.
- […] – Repeat everything within the brackets the indicated number of times.
- {…} – Repeat everything within the brackets the indicated number of times
Special Stitches
2 double crochet cluster (2dc cl) – YO, insert hook in indicated st, YO, pull up a loop, YO, pull through 2 loops, YO, insert hook in the same st, YO, pull up a loop, YO, pull through 2 loops, YO, pull through 3 loops on hook.
Double crochet 2 together (dc2tog) – [YO, insert hook in the next st, YO, pull up a loop, YO, pull through 2 loops] twice, YO, pull through all loops on the hook. This dc2tog is worked with the beg ch-2 across the 3 dc of the 1st GS of Rnd 6.
Double crochet 3 together (dc3tog) – [YO, insert hook in the next st, YO, pull up a loop, YO, pull through 2 loops] 3 times, YO, pull through 4 loops. This dc3tog is worked over the 3 dc of the GS below in Rnd 5.
Granny stitch (GS) – 3 dc in the same st or sp.
Half double crochet in the 3rd loop (hdc 3lp) – when working from the front side of the stitch below – YO, insert hook through the 3rd loop that sits behind and just under the top loop of the stitch, YO, pull through 3rd loop, YO, pull through all 3 loops on hook to complete the hdc.
Invisible join: At the end of the rnd, remove working loop from hook, insert hook from back to front through the top of the 1st st of the rnd, add working loop back onto the hook and pull through to the wrong side of the square; continue as instructed.
Puff – YO, insert hook in indicated sp, YO, pull up a loop, [YO, insert hook in the same sp, YO, pull up a loop] twice, YO, pull through 7 loops on hook.
Pattern Notes
- Do not turn after any rnd. All rnds are worked with right side facing.
- A ch-1 at the beg of a rnd does not count as a st.
- A ch-3 may be substituted for the STsc without altering the construction of the square
Video Tutorials
Click here to access the video tutorials on YouTube.
Pattern Instructions
Ch 4, join with a slip st to form a ring. OR, use a magic ring, tightening the ring at the end of Rnd 1.
Rnd 1: (STsc, 15 dc) in the ring, join with slip st to beg st. < 16 dc >
Rnd 2: (Ch 2, dc) in the same st (counts as 1st 2dc cl), ch 1, [2dc cl in next st, ch 1] 15 times, join with slip st to beg dc. < 16 2dc cl, 16 ch-1 sp >
Rnd 3: Slip st into the ch-1 sp, STsc, ch 2, [dc in the next ch-1 sp, ch 2] 15 times, join with slip st to beg st. < 16 dc, 16 ch-2 sp >
Note for Rnd 4: This rnd creates a square shape around the circle.
Rnd 4: Ch 1, hdc in the same st, 3 hdc in the next ch-2 sp, sc in the next st, 3 sc in the next ch-2 sp, sc in the next st, 3 hdc in the next ch-2 sp, hdc in the next st, [(puff, ch 3, puff) in the next ch-2 sp, hdc in the next st, 3 hdc in the next ch-2 sp, sc in the next st, 3 sc in the next ch-2 sp, sc in the next st, 3 hdc in the next ch-2 sp, hdc in the next st] 3 times, (puff, ch 3, puff) in the next ch-2 sp, join with slip st to beg st. Fasten off. < 8 puffs, 20 sc, 32 hdc, 4 ch-3 corner sp >
Note for Rnd 5: Count the hidden st after each corner when skipping 3 sts.
Rnd 5: Attach yarn to any ch-3 corner sp, (STsc, 2 dc, ch 3, GS) in the same corner sp, sk 3 sts, GS in the next st, [sk 2 sts, GS in the next st] 3 times, sk 2 sts, {(GS, ch 3, GS) in the ch-3 corner sp, sk 3 sts, GS in the next st, [sk 2 sts, GS in the next st] 3 times, sk 2 sts} 3 times, join with slip st to beg st. < 24 GS, 4 ch-3 corner sp >
Rnd 6: Ch 2, dc2tog over the next 2 sts (counts as 1st dc3tog), ch 2, (dc3tog, ch 3, dc3tog) in the ch-3 corner sp, {ch 2, [dc3tog across next GS, ch 2] 6 times, (dc3tog, ch 3, dc3tog) in the next ch-3 corner sp} 3 times, ch 2, [dc3tog across next GS, ch 2] 5 times, join with slip st to beg dc2tog. < 32 dc3tog, 28 ch-2 sp, 4 ch-3 corner sp >
Rnd 7: Ch 1, hdc in the same st, 2 hdc in the ch-2 sp, hdc in the top of the dc3tog, {(2 hdc, ch 2, 2 hdc) in the ch-3 corner sp, [hdc in the top of the next dc3tog, 2 hdc in the next ch-2 sp] 7 times, hdc in the last dc3tog} 3 times, (2 hdc, ch 2, 2 hdc) in the ch-3 corner sp, [hdc in the top of the next dc3tog, 2 hdc in the next ch -2 sp] 6 times, invisible join. < 26 hdc across each side, 4 ch-2 corner sp >
Note for Rnd 8: Be sure to work a hdc 3lp in the hidden st that may be covered by the corner sts from Rnd 7. Count the sts along each side as you go.
Rnd 8: Ch 1, hdc 3lp in the same st and in each st across to the ch-2 corner sp, [(2 hdc, ch 2, 2 hdc) in the ch-2 corner sp, hdc 3lp in the next st and in each st across to the next ch-2 corner sp] 3 times, (2 hdc, ch 2, 2 hdc) in the ch-2 corner sp, hdc 3lp in the next st and in each st across to the beg st, join with slip st to beg st. < 26 hdc 3lp across each side, 16 hdc, 4 ch-2 corner sp >
Note for Rnd 9: Count the hidden st in the 3 skipped sts after each corner.
Rnd 9: (STsc, 2 dc) in the same st (counts as the 1st GS), sk 3 sts, GS in the next st, sk 3 sts, (GS, ch 3, GS) in the ch-2 corner sp, {[sk 3 sts, GS in the next st] twice, [sk 2 sts, GS in the next st] 5 times, sk 3 sts, GS in the next st, sk 3 sts, (GS, ch 3, GS) in the ch-2 corner sp} 3 times, [sk 3 sts, GS in the next st] twice, [sk 2 sts, GS in the next st] 4 times, sk 2 sts, join with slip st to beg st. < 40 GS, 4 ch-3 corner sp >

Rnd 10: Ch 2, dc2tog over the next 2 sts (counts as 1st dc3tog), ch 2, [dc3tog across next GS, ch 2] twice, (dc3tog, ch 3, dc3tog) in the ch-3 corner sp, {ch 2, [dc3tog across next GS, ch 2] 10 times, (dc3tog, ch 3, dc3tog) in the next ch-3 corner sp} 3 times, ch 2, [dc3tog across next GS, ch 2] 7 times, join with slip st to beg dc2tog. < 48 dc3tog, 44 ch-2 sp, 4 ch-3 corner sp >
Rnd 11: Ch 1, sc in the same st, [2 sc in the ch-2 sp, sc in the top of the dc3tog] across to the ch-3 corner sp, {3 sc in the ch-3 corner sp, [sc in the top of the dc3tog, 2 sc in the ch-2 sp] across to the last st, sc in the top of the dc3tog} 3 times, 3 sc in the ch-3 corner sp, [sc in the top of the dc3tog, 2 sc in the ch-2 sp] across to the beg st, join with slip st to beg st. < 34 sc across each side, 3 sc in each corner >
Fasten off and weave in ends. Block if necessary using your favorite method or the one that best suits the fiber content of your yarn.

Round 6: is there a missing ch2 in the instructions? {[dc3tog across next GS, ch 2] 6 times, (dc3tog, ch 3, dc3tog) in the next ch-3 corner sp} You have a chain 2 before the corner, you have a chain 3 in the corner, but seem to go from the second dc3tog in the corner space straight into a dc3tog across the next GS. Should there be a ch2 in between?
(I’m starting late, I only spotted this CAL yesterday so I’m playing catch-up!)
Yes, there’s a ch 2 before and after each corner. I moved the opening bracket to include the ch 2. The instructions are now correct!
Thanks for finding that and for joining us!
-Debbie
This is a beautiful granny square. the stitch pattern really does remind one of a wagon wheel.
Thanks, I’m glad you like it!